Alternatively, you can enter "TRN005B" into the command line.
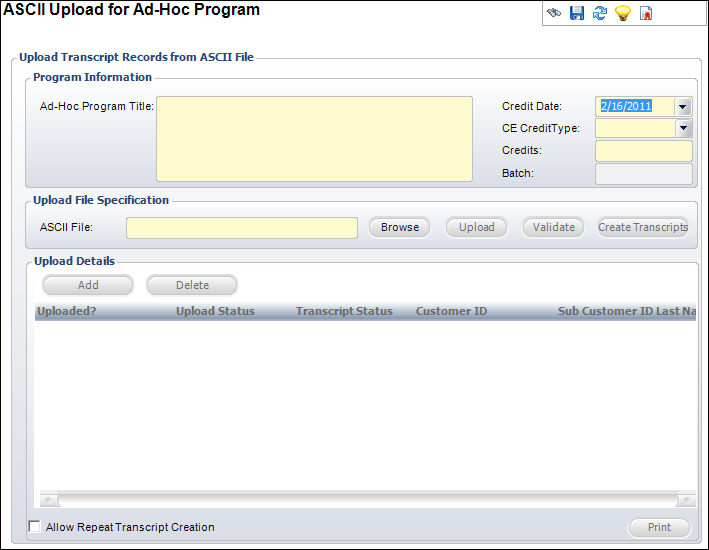
The ASCII Upload for Ad-Hoc Program screen displays, as shown below.
Transcript programs do NOT have to exist prior to upload. The ASCII file you upload must be tab delimited with a particular field structure and sequence. Records can be reviewed and edited prior to creating transcript records.
The upload automatically generates a screen report showing a list of ASCII records, the name of the customer from the database, and error codes (if they exist). The error codes explain why something cannot be loaded, and include the following:
· Customer number does not exist
· Customer name does not match the name in the ASCII file (based on the first 2 characters)
· Invalid validation code
· Grade below minimum
To upload the ASCII file for ad-hoc transcripts:
1. From the
Approved Transcript Program Definition screen, click ASCII
Upload for Ad-Hoc Transcripts from the Transcript Uploads task
category.
Alternatively, you can enter "TRN005B" into the command line.
The ASCII Upload for Ad-Hoc Program screen displays, as shown below.
2. Enter the Ad-Hoc Program Title.
3. Select the Credit Date from the drop-down.
4. Select the CE Credit Type from the drop-down.
5. Enter the number of Credits.
6. Click Browse and search for a file to upload.
7. If necessary, check the Allow Repeat Transcript Creation checkbox at the bottom left of the screen.
8. Click Upload.
9. Review the Upload Details and add or delete records as necessary.
10. Click Validate.
11. Click Save.
Screen Element |
Description |
|---|---|
Program Information |
|
Ad-Hoc Program Title |
Text box. A user-defined title for the ad-hoc program. |
Credit Date |
Drop-down. The date the credit will be given for the uploaded ad-hoc transcript records. |
CE Credit Type |
Drop-down. The type of credit that will be given to the uploaded ad-hoc transcript records. |
Credits |
Text box. The number of credits given to the uploaded ad-hoc transcript records. |
Batch |
Text box. The batch number of the uploaded ad-hoc transcript records. |
Upload File Specification |
|
Browse |
Button. When clicked, search for the ASCII file to upload. |
Upload |
Button. When clicked, the ASCII file is uploaded. |
Validate |
Button. When clicked, the ASCII file is validated. The upload validates the first five letters of the last name (when provided) with the last name of the customer in the database as a check for valid customer numbers being passed. |
Create Transcripts |
Button. When clicked, a transcript is created based on the ASCII file information. |
Upload Details |
|
Add |
Button. When clicked, a record is added to the upload. |
Delete |
Button. When clicked, the highlighted record is deleted from the upload. |
Button. When clicked, the ASCII file prints. |
|
Allow Repeat Transcript Creation |
Checkbox. When checked, indicates repeat transcript entries are permitted. You can use this checkbox to prevent accidental duplicates of uploaded ad-hoc transcripts. |
Seq # |
Field Name |
Required? |
Comments |
|---|---|---|---|
1 |
Master Customer ID |
Y |
Valid Customer ID |
2 |
Sub Customer ID |
Y |
Valid Sub Customer ID |
3 |
Last Name |
N |
First 2 letters will be validated against the customer’s last name in the database. |
4 |
Ad-Hoc Activity Description |
Y |
Activity Description |
5 |
Grade |
N |
Grade |
6 |
CE Credit Type Code |
N |
If not provided, the system will get it from the parameter entered by the user. If not provided by the user, system will evaluate each customer to make a determination of the CE Credit Type that should be awarded. |
7 |
CE Credits |
N |
If not provided, the system will get it from the parameter entered by the user. |
8 |
Comments |
N |
Comments |
9 |
Start Date |
N |
Activity Start Date |
10 |
End Date |
N |
Activity End Date |
11 |
Location Name |
N |
Location Name |