 This step assumes you have already installed Unified Search.
Users should have basic HTML and/or ASP.Net programming skills in order to modify the Unified Search Results page delivered in the 7.3.1 release.
This step assumes you have already installed Unified Search.
To modify the Unified Search Results page:
1. Navigate to the following file path in your Web Server:
(file path needed).../innetpub/wwwroot/PersonifyUnifiedSearch.
If your organization modified the website and folder name, make sure to navigate to that folder.
2. Open the Unified Search ASPX page in a text editor, such as Notepad.
3. Navigate to the <body> of the code.
You should see various “id” entries.
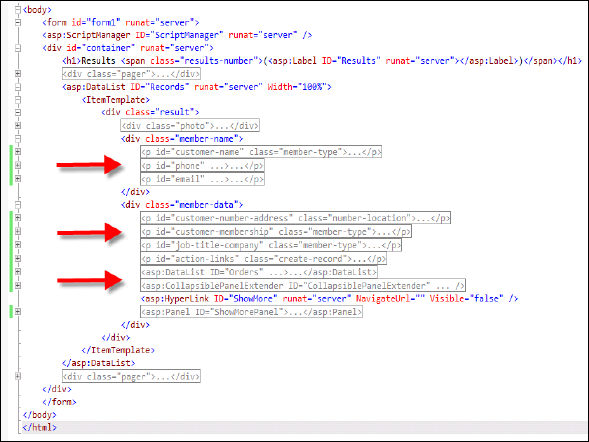
Each “id” entry contains code for the associated Unified Search results content.
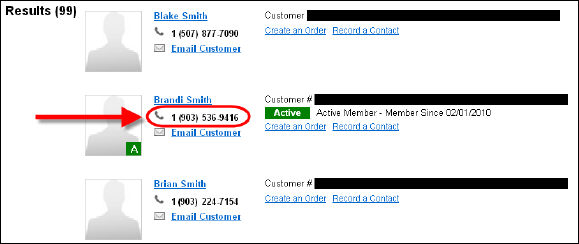
For example, <p id= “phone” ...>...</p> contains code that displays a customer’s phone number.
4. You can remove or comment out any of the “ids” from the code to remove that search result component. The search result components include the following:
· Customer Name
· Phone Number
· Email Address
· Customer Number
· Customer Membership Class
· Job Title and Company
· Links for Creating an Order or Recording a Contract
5. To disable the customer images, remove or comment out the following section of the code:
<div class= “photo”>...</div>
6. After you modify the code, save and close the file.
If you create an entirely new ASPX Unified Search Page, you need to modify the UNIFIED_SEARCH_URL Application Parameter from the System Parameter Maintenace (APP008) screen to point to the new website name, just as you originally did in the final steps of Applying the Unified Search Page.