The User Maintenance screen displays, as shown below.

Before you can define the GL accounts for the financial companies, you must first create access for the existing user using the Security module.
If you are using the System Administrator persona, you automatically have access to the organization and its components. However, if you are using any other persona or other personas need access to the new organization, you must follow the steps below.
To create access for your existing user into the new organization unit:
1. From the toolbar, select Security > User and Group Setup > User Setup.
2. Search for the User ID you are currently logged in as.
The User Maintenance screen displays, as shown below.
 The User ID can be found in the bottom menu bar in the middle position. The bottom menu bar displays the database, User ID, Organization Unit, and current screen in view.
3. Perform the following steps in the User Maintenance screen:
a. In the Assigned Organizations tab, expand your newly created organization and double-click your new organization unit.
This changes the red X to a green checkmark.
b. Highlight the new organization unit and click the Make Default link.
The organization and organization unit are now bold.
c. Click Save.
4. From the toolbar, select Security > User and Group Setup > Security Group Setup.
5. Click Add Security Group.
The Security Group Maintenance screen displays, as shown below.
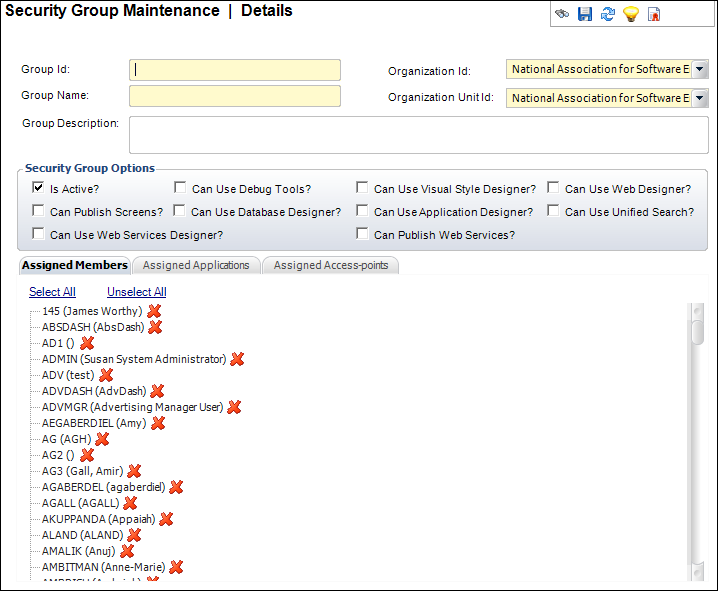
6. Perform the following steps in the Security Group Maintenance screen:
a. Define a Group Id code.
b. Define a Group Name.
c. Change the Organization Id to reflect your newly created organization code value.
Upon tab out, you will notice the information reflected under the Assigned Members tab changes. It now reflects only the current User ID.
d. Change the Organization Unit Id to reflect your newly created organization unit code value.
e. Select all checkboxes:
i. Is Active?
ii. Can Use Application Designer?
iii. Can Use Database Designer?
iv. Can Publish Screens?
f. In the Assigned Members tab, double-click your User ID.
This changes the red X to a green check mark.
g. In the Assigned Applications tab, click Default All Screens to Full Access to give permissions for the User ID to all screens within your new organization unit.
h. Click Save.
7. Click Define Personas from the Security Setup task category.
8. Click Create New Persona.
The Persona Maintenance screen displays, as shown below.
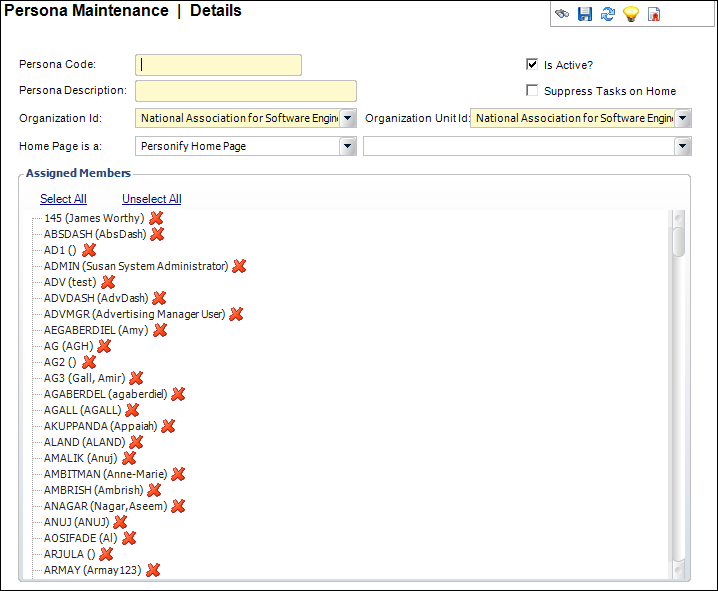
9. Perform the following steps in the Persona Maintenance screen:
a. Enter the Persona Code value and Persona Description.
b. Change the Organization ID to reflect your newly created organization code value.
Upon tab out, you will notice the information reflected under the Assigned Members section changes. It now reflects only the current User ID.
c. Change the Organization Unit ID to reflect your newly created organization unit code value.
d. Double-click your User ID.
This changes the red X to a green check mark.
e. Click Save.
10. Click Define Menu for this Persona from the Menu Setup task category.
The Persona Menu Designer screen displays.
11. Perform the following steps in the Persona Menu Designer screen:
a. Select the Menu Import tab.
b. Select the startup Organization, Org Unit, and Persona (system administrator).
c. Drag-and-drop every menu structure from the right menu to the left menu.
d. Click Save.
12. Access the User Maintenance screen and perform the following steps:
a. In the Assigned Security Groups tab, expand your new organization and organization unit to ensure your security group is enabled (has a green checkmark).
b. In the Assigned Personas tab, expand your new organization and organization unit to ensure your security group is enabled (has a green checkmark).
c. Highlight the new persona and click Make Default.
The organization and organization unit are now bold.
d. Click Save.
13. Close all open screens until you reach the Start screen. You can also close all screens by selecting Window > Close All Windows from the menu bar.
14. From the menu bar, select File > Change Organization.
The Organization Chooser screen displays.
15. Select the Organization and Organization Unit and click OK.