 See the training section Taskbar Designer for more information.
To customize workflow to the persona, Personify360 has a taskbar, which lets you navigate through different subsystems or modules within a subsystem, while still using the customer ID, product ID, etc., that you began with. For example, if you choose a product in Product Central, you can set up all the necessary criteria for that product (i.e., GL Accounts, eBusiness Controls, etc.) using the taskbar, while continuing to use the that product’s ID. For any new screens created, you can design a corresponding taskbar to help with the workflow of that screen.
See the training section Taskbar Designer for more information.
To design a taskbar:
1. From the Behavior section of the Properties window, select Taskbar, and click the button with an ellipsis on it.
The Task Bar Designer displays as shown below.
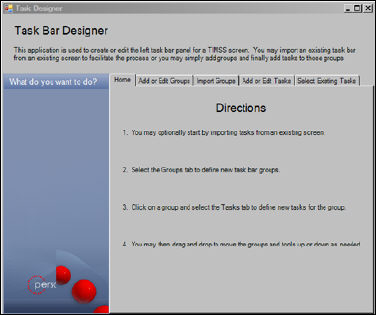
2. Click the Add or Edit Groups tab.
3. Click Add a Group and rename the group by clicking the Name property.
You set the properties for the group using the same properties as those used for the screen controls.
Repeat this step for each group you want in the taskbar.
4. In the right side of the Task Bar Designer window you will see a “mock” taskbar. Click the task group for which you would like to add tasks and click the Add or Edit Tasks tab.
5. Click Add a Task.
A new task will appear within the group you selected in Step 4.
6. Set the properties for this task as necessary.
A task follows the same guidelines as a LinkLabel control. Therefore, it is necessary to create a command for the task using the Command Builder.
At this time the Import Groups and Select Existing Tasks tabs are still in development.