 As of 7.1, new features have been added that will greatly effect publishing your forms. Please see Working with Pre-Compiled Screens for more information.
As of 7.1, new features have been added that will greatly effect publishing your forms. Please see Working with Pre-Compiled Screens for more information.
Once you create or edit a form using the Application Designer, you most likely want to make the form(s) available for all users. Upon opening Design This Form, the Application Designer automatically saves your changes to your hard drive in the “Sandbox” folder.
To save the modified form onto the server:
1. Click the Publish icon or click File > Publish.
The Publisher window displays as shown below.
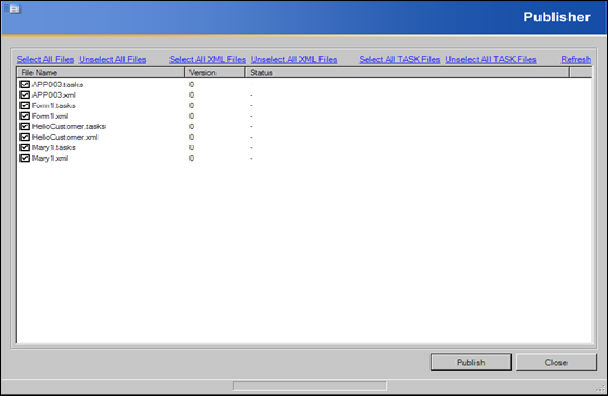
2. Using the checkboxes, select the file name(s) you wish to publish to the server.
3. Click Publish.
The Status column will read “Published Successfully” next to the chosen files and the form is now moved from the “Sandbox” location on your hard drive and saved to “Custom” on the server.
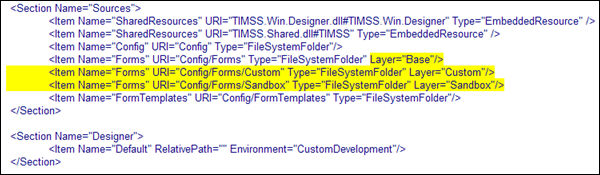
You can also check the Back Office Client Config file to view the code for your newly created or edited form. This highlighted code should appear in the Back Office Client Config file:
This code should appear in the Application Server Config file:
<!- Sets up the Publishing services ...->
<SetupStrategy Path=”TIMSS.Server.BusinessImplementation.dll” Name=”TIMSS.Server.BusinessImplementation.PublishingServices.PublishingServicesSetupStrategy” />
After you have published your new form to the server, you will have to add it to the security system, assign it to a security group, and add a menu item in one or more personas to make it visible to users.