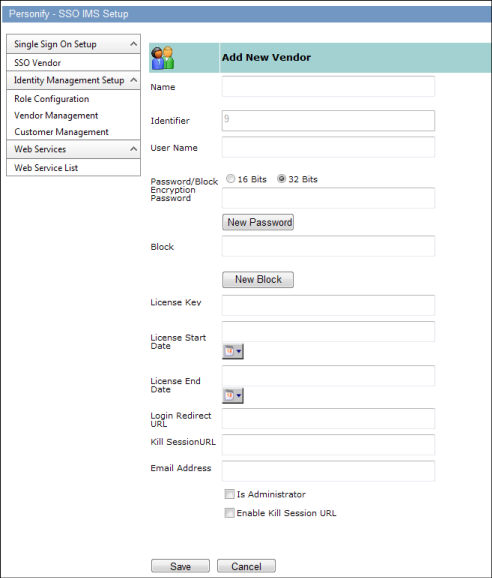
The Add New Vendor page displays with a system generated read-only Identifier for the new vendor, as shown below.
This module allows the administrator to manage the list of participating vendors for Single Sign-On. The same vendor list will be used in Identity Management for role assignments.
The Control File is:
DesktopModules/IMSModules/SSOAdminWebParts/SSOAdminWebParts/SSOVendor.ascx
To set up a new vendor:
1. While
on the SSO IMS Setup page, under the Identity Management Setup heading
on the left, click SSO Vendor.
The Vendor Search screen displays.
2. Click
New to add a new vendor.
The Add New Vendor page displays with a system generated read-only Identifier for
the new vendor, as shown below.
3. Choose
a unique Name for the vendor.
The Name can be alphanumeric.
4. Choose a unique User Name for the vendor.
5. Select
the Password/Block Encryption option.
By default, the application will select the 32-bit encryption method.
6. Click New Password to generate the password for the vendor.
7. Click New Block to generate the Block ID for the vendor.
8. Enter the vendor License Key.
9. Enter the License Start Date and License End Date.
10. Enter
the Log in Redirect URL.
This URL is where the user is sent in the event of a failure of the page
he or she is attempting to access.
11. If necessary, enter a Kill Session URL.
12. Provide the Email Address for the Point Of Contact at the vendor. This email address will be used in the vendor email communication option provided by other modules.
13. Check Is Administrator if this vendor is to be given administrator privileges.
14. Check Enable Kill Session URL if the vendor uses a kill session URL.
15. Click Save.