 For
a video demonstrating how to install the plug-in as an end user, refer
to Video
Demo: Installing the Plug-In.
 For
a video demonstrating how to install the plug-in as an end user, refer
to Video
Demo: Installing the Plug-In.
To restart Outlook and verify the plug-in was successfully installed:
1. Before restarting Outlook, you should have installed the plug-in. Refer to Step 3: Installing the Plug-in for more information.
2. If Outlook is open, close and reopen it.
3. If the application
asks you to verify the Personify360 Outlook Plug-In Add-In customization,
click Install. If not, proceed to the next step.

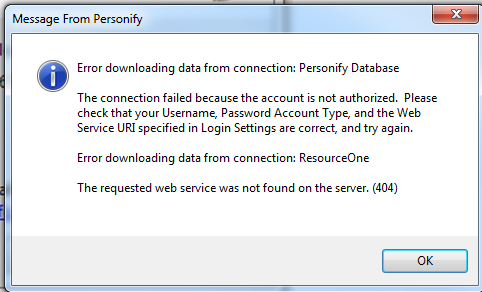
 If the following
error message displays, it is because you have not added the Personify360
database to the plug-in. Click OK.
You will add the database to the plug-in on the next step (Step 5: Configuring the Account Settings).

4. The Personify
Actions menu displays in your ribbon bar, as highlighted below. If this
displays, proceed to configuring the account
settings. If this does not display, proceed to the next
step below.

5. From
the menu bar, select File >
Options.
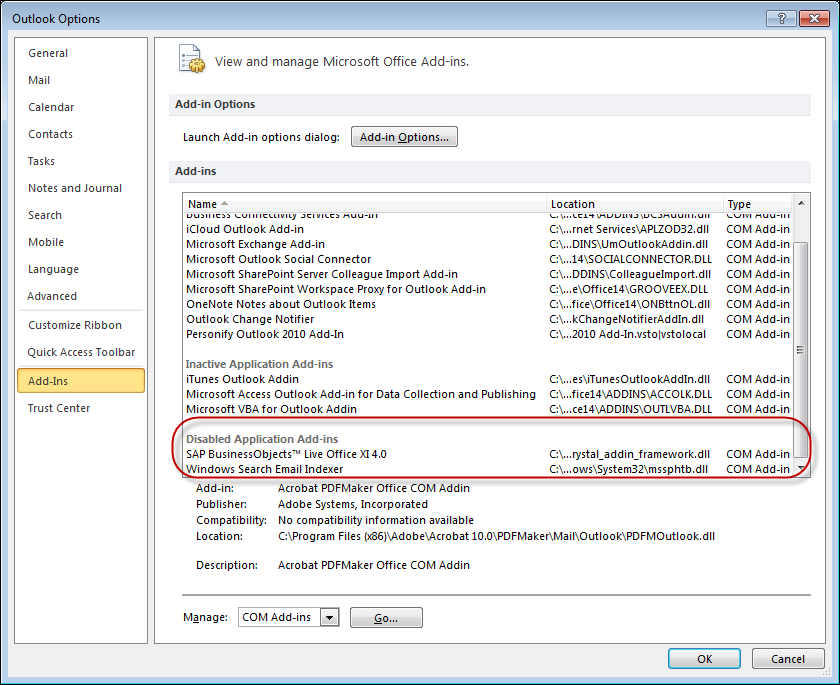
The Outlook Options screen displays.
6. From the
left-side menu, select Add-Ins.
The Add-in screen displays.
7. Verify that the plug-in is not listed in the "Disabled Application Add-ins" section, as highlighted below. If it is listed, perform the following:
a. From the Manage drop-down, select "Disabled Items".
b. Click
Go.
The Disabled Items screen displays.
c. Select
"Personify Outlook Add-In" and click Enable.
The plug-in is no longer listed in the Disabled Application Add-ins section.
d. Click Close.
e. Click
OK to close the screen.

8. If you still do not see the Personify Actions menu option on your ribbon bar in Outlook, verify that there are no previous versions of the plug-in installed on your computer.
a. Uninstall any previous versions of the Outlook Plug-in, as well as the current version.
b. Re-install the current version.
c. If it is not displaying after verifying it is not listed in the Disabled Application Add-ins section, please contact your System Administrator.