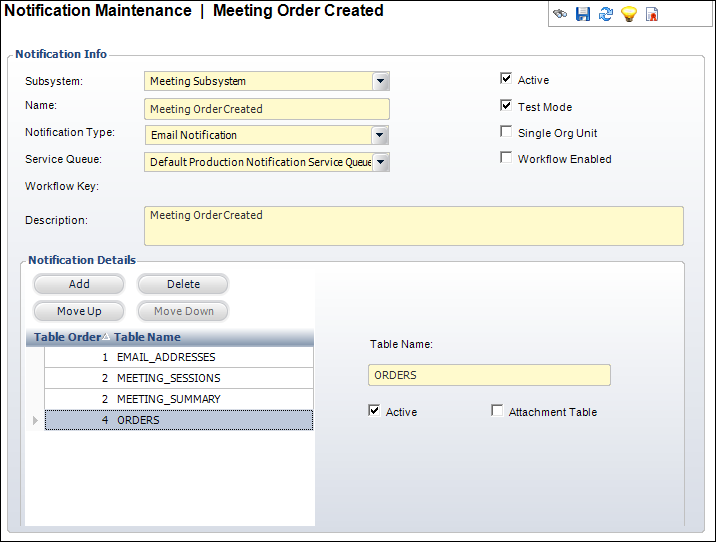
The Notification Details screen displays, as shown below.

The Notification Details screen displays the names of data tables returned by the stored procedure for the notification event. By default, when a stored procedure is written to return data it names the results as Table(0), Table(1), Table(2), etc. This screen allows you to rename the tables in the result set to more user friendly names such as Customer, Addresses, Demographics, etc.
To edit the table names:
1. From the
Notification Maintenance task bar, click Edit Procedure
Table Names.
The Notification Details screen displays, as shown below.

2. Click
Add.
A new row is added to the grid and the accompanying fields become active.
3. Enter the Table Name.
4. If necessary, uncheck the Active checkbox.
5. If necessary, check the Attachment Table.
6. Click Save.
Screen Element |
Description |
|---|---|
Add |
Button. When clicked, a new row is added to the grid and the accompanying fields become active. |
Delete |
Button. When clicked, the highlighted row is removed from the grid and the accompanying information is removed from the system. |
Move Up |
Button. Allows you to set the table sequence order. When clicked, the highlighted row is moved up in the order. |
Move Down |
Button. Allows you to set the table sequence order. When clicked, the highlighted row is moved down in the order. |
Table Name |
Text box. The name of the table as it is will be referenced in the HTML template for this notification.
|
Active |
Checkbox. Displays whether or not this table is active for this notification event. |
Attachment Table |
Checkbox. When checked, the table name is set to the constant value “ATTACHMENTS”.
|