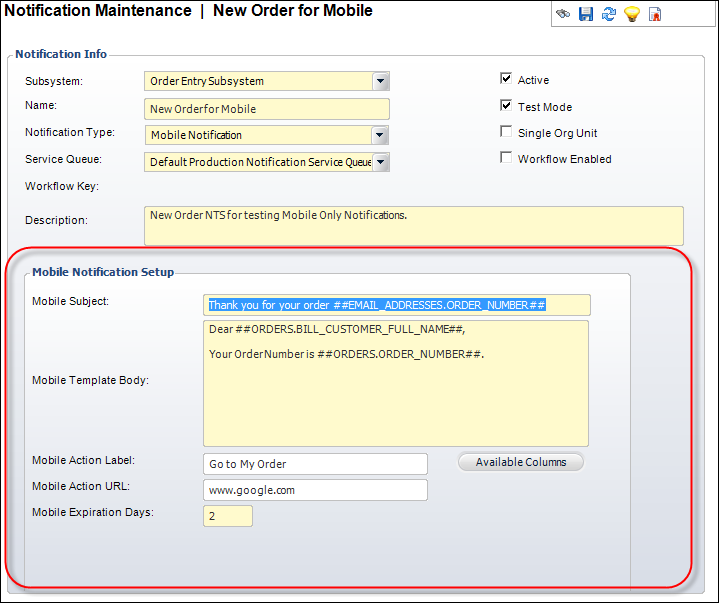
The Mobile Notification Setup section displays, as highlighted below.

After you have set up the mobile test recipient and created a mobile notification, you can edit the message sent to the mobile users.
To edit the notification message template:
1. From the
Notification Maintenance taskbar, click Edit Mobile
Notification Template.
The Mobile Notification Setup section displays, as highlighted below.

2. Enter
a Mobile Subject for the mobile notification.
You can choose to add information from specific tables and columns into
the Subject by entering the data element in the following format: ##Table
Name.Column Name##.
For example, “Confirmation of Order ##ORDER_NUMBER##” generates a subject
line similar to “Confirmation of Order 10045.”
3. Enter
the Mobile Template Body.
Enter the email body information (text, graphics, etc.) as you want it
to display on the outgoing notification email. You can also choose to
add information from specific tables and columns into the HTML message.
For example, if you want to display a product code in the email.
To add a table name and column to your message:
1. Place your cursor where you want the table name and column to display.
2. From the
HTML Editor Dialog window, click Available Columns.
The Generic Chooser displays.
3. Highlight
the table name whose information you want to display in your message and
click Select.
The name displays in your message.
 Mobile notifications
do NOT support the use of tables within the Mobile Template Body field.
4. If necessary, enter
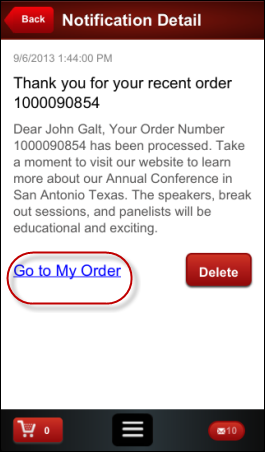
the Mobile Action Label.
This is the label that will be displayed below the notification message,
as highlighted below.

5. If you
entered a Mobile Action Label, enter the Mobile Action
URL.
This URL will open in the mobile browser when the user clicks the button
highlighted above.
6. Enter the Mobile Expiration Days.
7. Click Save.
Screen Element |
Description |
|---|---|
Mobile Subject |
Text box. This is the subject of the outgoing email notification.
|
Mobile Template Body |
Text box. This is the body text of the notification sent to mobile users.
|
Mobile Action Label |
Text box. If you want the user to be able to access a URL from the notification, this is the text that will display on the button. If you do not want the user to access a URL, do NOT enter a Mobile Action Label or Mobile Action URL. |
Mobile Action URL |
Text box. If you entered a Mobile Action Label, this is the URL where the user will be taken when they click the Mobile Action Label button. |
Mobile Expiration Days |
Text box. The number of days the notification will remain on the user's mobile device, unless the user opts to manually delete the notification from their device. |
See Also:
· Create a mobile notification.
· Modify the stored procedure.