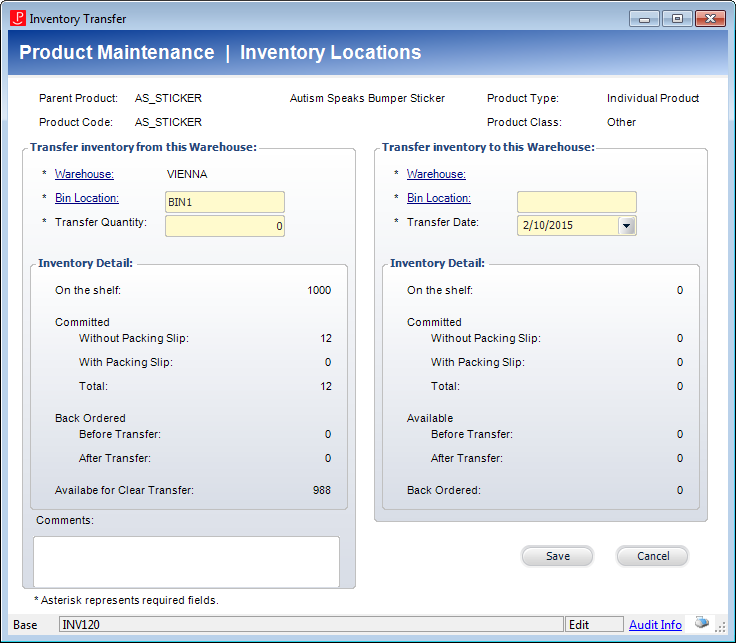
The selected warehouse and bin location automatically display, as shown below.

The Inventory Transfer screen specifically moves inventory from one warehouse to another or from one warehouse location to another location within the same warehouse. Because multiple locations in a single warehouse are allowed, each inventoried item must be defined specific to a bin location. The system back-orders any committed orders when the inventory is transferred out.
If you try to transfer inventory to a warehouse which does not currently store inventory for this product, a warning message will display but you can still continue with the process. There are no cost implications to an inventory transfer.
To create an inventory adjustment:
1. On the Product Maintenance screen, from the Subsystem Specific task category, click Inventory Transfer.
The selected warehouse and bin location automatically display, as shown below.

2. From the Transfer inventory from this Warehouse section, click the Warehouse or Bin Location links to search for and select a different warehouse or bin location.
3. Enter the Transfer Quantity.
4. From the Transfer inventory to this Warehouse section, click the Warehouse or Bin Location links to search for and select a warehouse and bin location to which to the inventory.
5. By default, the Transfer Date is set to today. If necessary, select a different Transfer Date from the drop-down.
6. If necessary, enter any Comments.
7. Click Save.
8. Click Cancel to close the Inventory Transfer screen.