The General Setup screen displays.
To create a new sponsorship product:
1. From the
Personify360 main toolbar, select Products > Product
Central.
The Product Maintenance search screen displays.
2. Click
Create New Product.
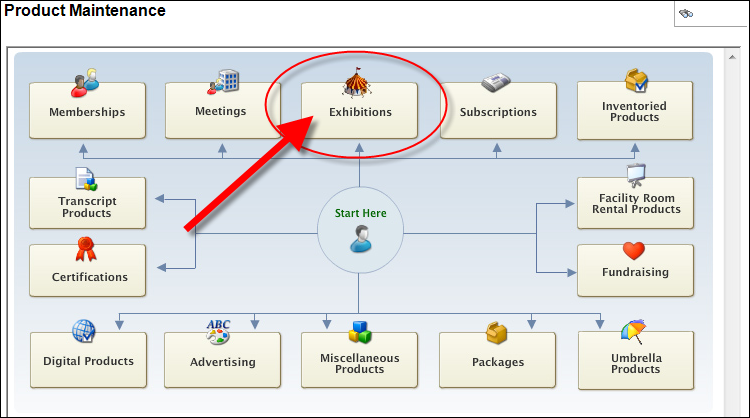
The Product Maintenance screen displays.
3. Click
Exhibitions, as shown below.
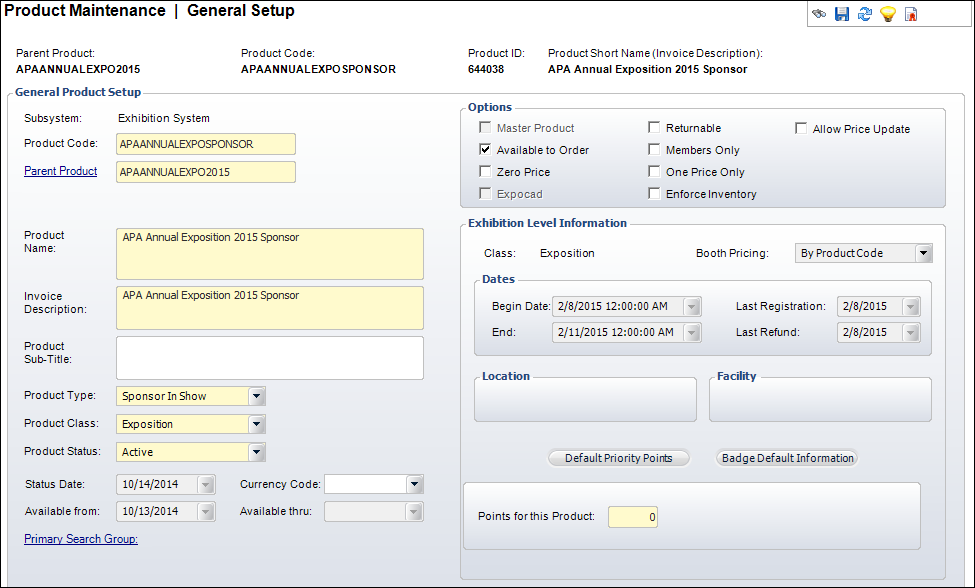
The General Setup screen displays.
4. Enter
the Product Code.
The Parent Product defaults to the value entered as the Parent Code.
5. Click the Parent Product link and select the appropriate parent product. A pop-up displays asking if you would like to copy the product and revenue accounts of the parent product. Select Yes or No and click OK to continue.
6. Enter
the Product Name.
The Invoice Description defaults to the value entered as the Product Name.
7. Enter the Product Sub-Title.
8. Select
the Product Type of “Sponsor in Show” from the
drop-down.
The Exhibition Level Information section displays, as shown below.
9. Select the Product Status from the drop-down.
10. If your organization uses multi-currency, then select the appropriate Currency Code.
11. Check the checkboxes that apply:
· Available to Order
· Zero Price
· Returnable
· Members Only
· One Price Only
· Enforce Inventory
· Allow Price Update
12. In the Exhibition Level Information section, enter the Points for this Product.
13. If necessary,
click Default Priority Points.
See Defining
Priority Points for more information.
14. If necessary,
click Badge Default Information.
See Defining
Badge Default Information for more information.
15. Click Save.
Screen Elements |
Description |
|---|---|
Exhibitor Level Information |
|
Booth Pricing |
Read-only. Identifies whether the price for the exhibition product will be calculated based on the flat amount price defined for the product or whether the defined price is a square unit price (where the total price is calculated by multiplying the square unit price by the total number of square units of booth). This field populates automatically based on the Parent Product selected. |
Begin Date |
Read-only. The beginning date of the sponsorship. This date populates automatically based on the Parent Product selected. |
End Date |
Read-only. The end date of the sponsorship. This date populates automatically based on the Parent Product selected. |
Last Registration |
Drop-down. The date the registration period ends. This date populates automatically based on the Parent Product selected. This date is compared to the order date when the exhibition registration is entered. If a batch is open when the registration is entered, the order date is set to the batch date, not the system date. |
Last Refund |
Drop-down. The last date on which refunds can be generated for this exhibition. This date populates automatically based on the Parent Product selected. If a batch is open when the refund is being generated, the system compares the Last Refund Date to the batch date. |
Location |
Read-only. The exhibition hall in the facility where the booths are located. |
Facility |
Read-only. The primary facility for the exhibition. |
Default Priority Points |
Button. When clicked, the Priority Points screen displays. Exhibitors can be awarded priority points for signing up for an exhibition. They can accrue points per booth, square unit, or dollar, and use these points for additional benefits. Some associations use the accumulated priority points to determine which company receives the best space in subsequent shows. See Defining Priority Points for more information. |
Badge Default Information |
Button. When clicked, the Free Badge Maintenance screen displays. You can define the number of free badges that will be provided for each booth or per total square area of space. See Defining Badge Default Information for more information. |
Points for this Product |
Text box. Exhibitors can be awarded priority points for signing up for an exhibition. Enter the number of points that will be awarded for those who rent or share this booth. |