 If
the API Library is not installed for your portal, use the following procedure.
If
the API Library is not installed for your portal, use the following procedure.The API Library is used by the web modules to connect to and call upon back office data.
 If
the API Library is not installed for your portal, use the following procedure.
To set up API Library:
1. Log in to e-Business as a host user.
2. From the
toolbar, select Admin > Advanced > Extensions,
as shown below.

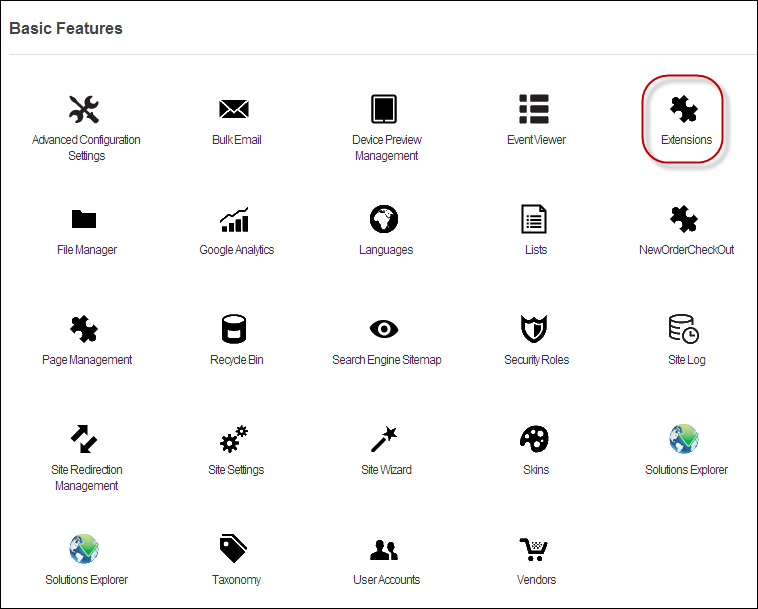
Or, from the toolbar, select Admin.
The Basic Features page displays.
3. Select
the Extensions link, as shown below.

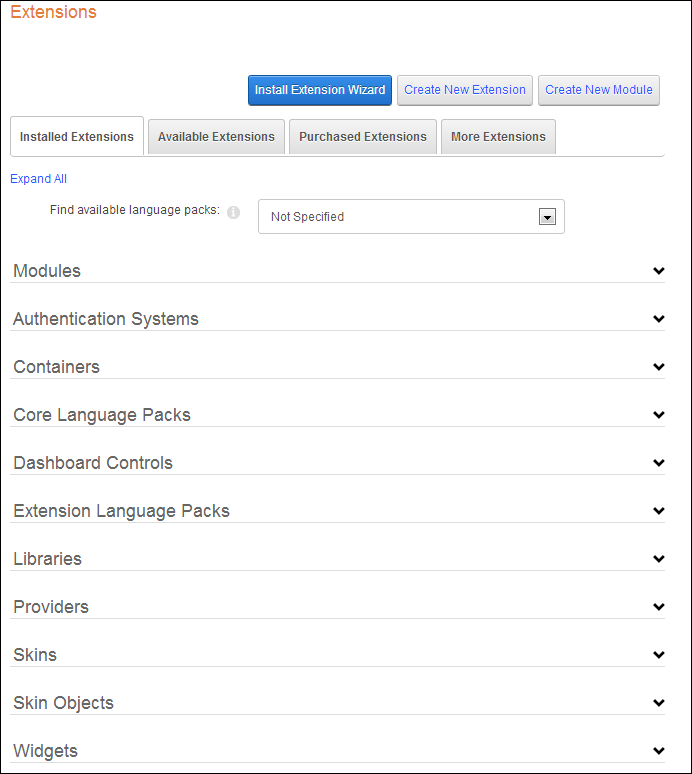
The Extensions page displays, as shown below.

4. Click
the Install Extension Wizard button.
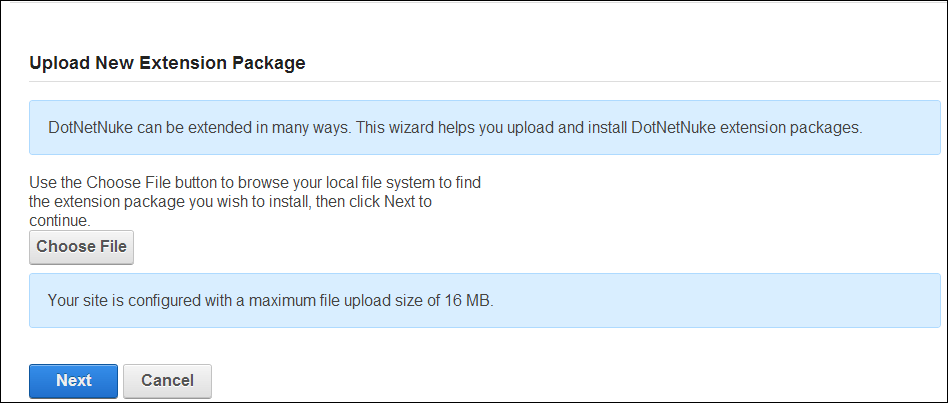
This opens the Install Extension Wizard window, as shown below.

5. In the
Upload New Extension section, select the Choose File button.
A pop-up window displays.
6. Locate the API Library package and select Open.
7. Once selected, click Next.
8. Optional. The Upload Results page will be displayed if there is an unusual result such as a legacy Skin or Container, or the language package has already been uploaded. In this case, select the required action and click the Next link - OR - Click Cancel and start again.
9. On the Package Information page, review the package information and then click the Next link.
10. On the Release Notes page, review the release notes and then click the Next link.
11. On the Review License page:
a. At License, review the license for this extension.
b. At Accept License? check the checkbox to agree to the license terms.
c. Click the Next link.
12. On the
Package Installation Report page, review the
package installation results and then click the Return
link to return to the module that you accessed the Wizard from.
Once you complete the API Library installation, it appears in the list
of available modules in the Module Definition menu, as shown below.

 For
more information about hosting, installing, editing, etc. an extension,
refer to the Extensions section.
Unlike web modules, there are no settings to edit for the API Library.