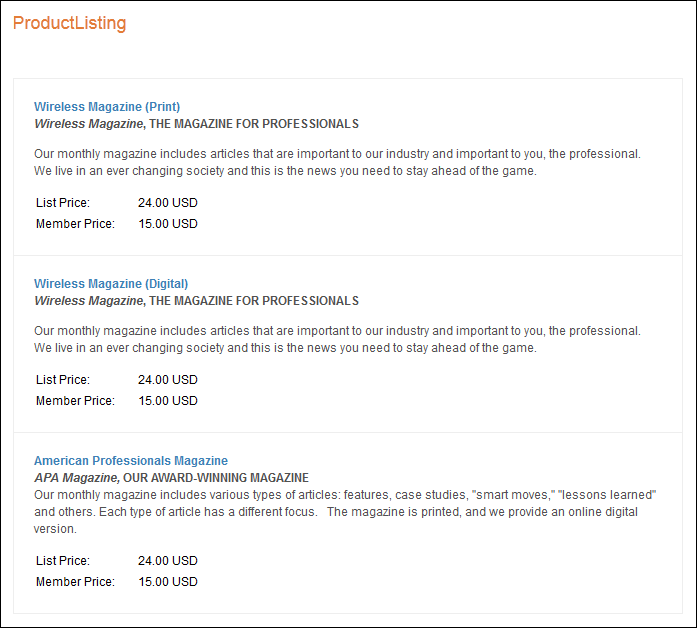
The following page displays:
The Product Listing web module enables the display of your organization's product catalog and is the centerpiece of your store's navigational user experience.
This web module is customizable and allows you to expose more functionality than a simple product listing. Your organization has the ability to create:
· Featured Products Catalogs
· Promotional Products Catalogs
· Random Products Displays
· Specific Products Displays
· Navigational Links Between the Product Directory and the Product Detail web modules
· Product Listings for any combination of Product Types (Subsystem)
It also enables the webmaster to specify what product type (by subsystem) to display. This feature, coupled with the “template” model, allows for a custom user interface display for each different product type.
The Product Listing web module also displays product availability. If an item is out of stock, the next expected receipt date is provided, if available. In addition to displaying the list and member price of an item, the web module also displays the price specific to the user so that there is no confusion. If you are registering for a meeting, you can sort the product listing content by class, begin date, and location.
Once you added the web module to the desired page, you must configure it
from the web module’s menu. This only needs to be done the first time
that you configure the web module and is done using the wizard-like menu.
To configure the Product Listing web module:
1. Log into your site as Host.
2. Navigate to the appropriate page on your site where you want to add the Product Listing web module.
3. Add the Personify – Product Listing module to where you want it to be located on your page. See Adding a Web Module to the Webpage for more information.
4. From the
pencil icon, select Edit, as highlighted below.
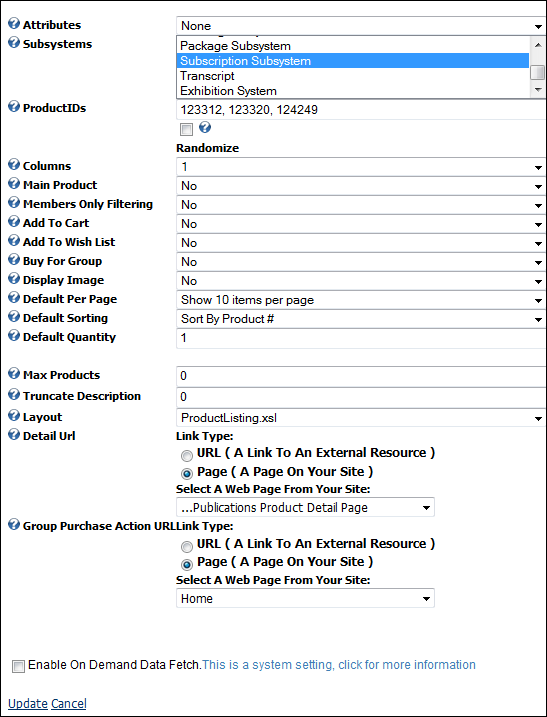
The following page displays:
5. Configure the appropriate module settings as described below:
· Attributes - Drop-down. The Attributes option allows you to set a product as either Featured, Promotional, or Featured or Promotional. If you set a product as Featured, only Featured products are displayed in the page with the web module. Similarly, if you set a product as Promotional, only Promotional products are displayed, etc.
· Subsystems - Up/Down Control. All products must
be assigned a Subsystem.
For example, a Meeting product would likely be assigned the Meeting Subsystem,
etc.
· Product IDs - Text box. Allows you to specify
any number of specific products by providing a list of Product IDs separated
by a comma (",") or a semicolon (";").
For example, entering “3144,555,3768,9765,7616” would result in the display
of 5 products. This option does not determine if a ProductID is valid
or active. If you input an invalid or inactive ProductID, it does not
appear.
· Columns - Drop-down. This setting allows you to define basic layout schemes without having to make HTML mark-up code changes. By default, the web module is set to a single column. You may select up to five columns.
· Main Product - Drop-down. Selecting this option displays the first product in the record set in a more prominent banner spot at the top of the listing. The listing that follows the main product will also inherit the “Columns” setting and displays the products in as many columns were selected. The layout and behavior of the layout settings can also be modified in the XSL templates. XSL templates are detailed later in this section.
· Members Only Filtering - Drop-down. This setting allows you to display products that are marked for members only to users that meet the criteria of membership. Non-Members will not be able to purchase a Member Only product. If you leave this option unchecked, it will unnecessarily take non-members through the online purchasing procedure, only to find they cannot complete the transaction because they do not meet the membership requirements.
· Add To Cart - Drop-down. This setting enables you to define the work-flow and user experience by enabling or disabling the option to allow a user to purchase a product directly from a Product Listing. Disabling this setting will hide the “Add to Cart” button on the listing, which then forces the user through the work-flow defined by the “Detail URL” setting. In most cases the “Detail URL” is the last page a user is driven to see the full details of the product. The control will only completely disappear from the listing if both the “Add to Cart” and “Add to Wishlist” settings are disabled.
· Add To Wish List - Drop-down. This setting enables you to define the work-flow and user experience by enabling or disabling the option to allow a user to add a product to his/her wishlist from a product listing. Disabling this setting will hide the “Add to Wishlist” button on the listing. The only other location from which a user is able to add an item to the wishlist is the Product Detail page. The control will only completely disappear from the listing if both the “Add to Cart” and “Add to Wishlist” settings are disabled.
· Buy For Group - Drop-down. This setting allows you to determine whether or not the customer can buy the product for a group.
· Display Image - Drop-down. This setting allows you to either hide or show the product images on the listing.
· Default Per Page - Drop-down. This setting allows
you to choose the maximum number of result items shown per page. By default,
the listing shows up to 10 result items per page. Using the drop-down,
you can select between 10 and 30 results per page. The options drop-down
is built from a name-value pair string located in the web module's localization
file called “ProductListingEdit.ascx.rex”.
The default string is as follows:
10|Show 10 items per page|20|Show 20 items per page|30|Show 30 items per
page
If you wished to add options for 40 and 50 items per page the string would
look as follows:
10|Show 10 items per page|20|Show 20 items per page|30|Show 30 items per
page|40|Show 40 items per page|50|Show 50 items per page.
 To edit
this option, in the DotNetNuke Language Editor perform the following:
To edit
this option, in the DotNetNuke Language Editor perform the following:
1.
Log in as the website Administrator.
2. Locate
the Languages Menu Items located in the Admin Tab.
3. Select
“Language Editor.”
4. From
the Tree control on the left-hand side, locate and click on the following
entry:
LocalResources\DesktopModules\Personify
- ProductListing\App_LocalResources\
ProductListingEdit.ascx
You
can now edit the resource strings for this web module.
· Default Sorting - Drop-down. This setting allows you to set the default method in which the system sorts the products. For example, by product number, title, etc.
· Default Quantity - Text box. This setting allows you to choose the default quantity of a product when it is selected for purchase. By default, it is set to one.
· Max Products - Text box. The “Max Products” setting allows you to restrict the number of products to be displayed on the page. This is useful when wanting to display a set number of “Featured” and or “Promotional” products, or to promote a set number of specific products. This setting restricts the result set displayed to this number, even though the filter specified in your settings may generate a result set larger than the specified maximum number of products.
· Truncate Description - Text box. This setting allows you to define a maximum character length of the product description. By default, the entire (long) description is shown.
· Layout - Drop-down. The Product Listing web module
allows you to modify the layout of the rendered listing without the need
of any programming knowledge other than basic knowledge of HTML, XSL (Extensible
Style Sheet Language) and XSLT (Extensible Style Sheet Language Transformations).
The layouts are stored as XSL files which contain the transformation logic
of the data.
The “Layout” setting enables the Webmaster to select specific XSL templates
and render the data in different layout and design formats.
The Product Listing renders the webpage by transforming the incoming data
according to the style specified in the XSL file. This is done by using
XML transformation.
To add additional templates, copy them to this folder (Website Root\DesktopModules\Personify
- ProductListing\Templates). They will automatically appear in the Layout
drop-down control. Modifying, adding, or removing the layout templates
does not required code compilation.
· Detail URL - Radio button and drop-down. This setting allows you to determine where the customer is directed upon clicking the Detail link.
· Group Purchase Action URL - Drop-down. This setting allows you to determine where the customer is directed upon making a group purchase.
6. Click Update.
XSL is a language for expressing style sheets. An XSL style sheet is a file that describes how to display an XML document of a given type. XSL shares the functionality and is compatible with CSS2 (although it uses a different syntax). It also adds:
· A transformation language for XML documents: XSLT. Originally intended to perform complex styling operations, like the generation of tables of contents and indexes, it is now used as a general purpose XML processing language. XSLT is thus used for purposes other than XSL, such as generating HTML webpages from XML data.
· Advanced styling features, expressed by an XML document type that defines a set of elements called Formatting Objects, and attributes (in part borrowed from CSS2 properties and adding more complex ones).
For more information on XSLT visit the W3C website.
XSLT (Extensible Style Sheet Language Transformations) is a standard subset language of XML designed to allow one XML data structure to be transformed into other document structures. For example, XML files can be transformed into HTML, into WML for display on Web-enabled mobile phones etc.
For more information on XSLT visit the W3C website.
Depending on the parameters you selected when setting up the Product
Listing web module, your customers will see the module similar to the
one displayed below.