This
web module must appear on the same page with the Product Detail and Order
Create web modules in order to use the one-click checkout feature.
This
web module must appear on the same page with the Product Detail and Order
Create web modules in order to use the one-click checkout feature.The Order Payment web module is used to prepare orders for shipment and then to accept order payments. It is also used in conjunction with the one-click checkout process.
This
web module must appear on the same page with the Product Detail and Order
Create web modules in order to use the one-click checkout feature.
To configure the Order Payment web module:
1. Log into your site as Host.
2. Navigate to the appropriate page on your site where you want to add the Order Payment web module.
3. Add the Personify – Order Payment module to where you want it to be located on your page. See Adding a Web Module to the Webpage for more information.
4. From the
pencil icon, select Edit, as highlighted below.

The following page displays:
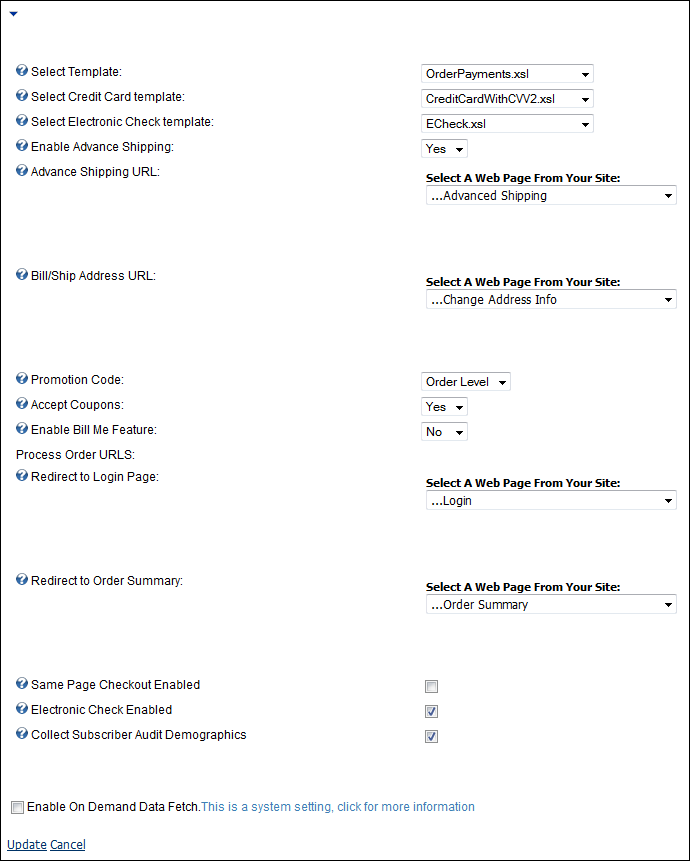
5. Configure the appropriate module settings as described below:
· Select Template - Drop-down. This setting controls
the display of the Product Details, Bill/Ship Address, Shipping Details,
and Order Totals on the page.
The web module contains two templates:
o OrderPayments.xsl – Has all controls available for order processing. The user can change the address, choose shipping details, etc. from this template.
o BlankOrderPayments.xsl
– This template does not have these options, however, the organization
can choose to add controls from the main template. The BlankOrderPayments
template allows users to set up the web module for use on a one-click
purchase page.
For example, an organization may want to provide shipping options for inventory
products using the one-click checkout process. By adding the necessary
controls to the template (copied from the OrderPayments template), they
can be made available.
· Select Credit Card template - Drop-down. This setting allows you to select the template in which the Credit Card section displays.
· Select Electronic Check template - Drop-down. This setting allows you to select the template in which the electronic check functionality displays to the user. The Electronic Check Enabled checkbox must be checked for this template to display.
· Enable Advance Shipping - Drop-down. When selected, a link to the Advance Shipping page displays.
· Advance Shipping URL - Drop-down. This setting allows you to determine the webpage to which the customer is directed to upon clicking the Advance Shipping link.
· Bill/Ship Address URL - Drop-down. This setting allows you to determine the webpage that contains the Customer Address web module.
· Promotion Code - Drop-down. This setting displays the promotion code for either each order line or the entire order depending on the setting.
· Accept Coupons - Drop-down. This setting determines whether or not coupons are accepted.
· Enable Bill Me Feature - Drop-down. This setting determines whether or not you allow customers to be billed for their order instead of requiring an immediate payment.
· Redirect to Login Page - Drop-down. This setting allows you to select the Login page where the customer is sent if they are not already logged in.
· Redirect to Order Summary - Drop-down. This setting allows you to determine the webpage to which the customer is directed to if the Process Order is successful.
· Same Page Checkout Enabled - Checkbox. When checked, the web module is set up for same page purchasing.
· Electronic Check Enabled - Checkbox. When checked, the web module is set up for electronic check payment. In the back office, the Check_Type application code must be set. The Check_Type code (e.g., Personal) must also have the “Available for Web” checkbox checked.
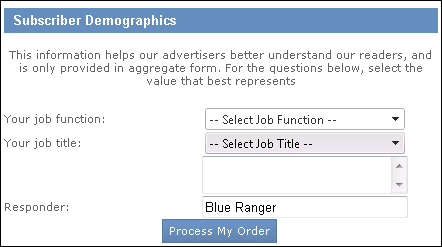
· Collect Subscriber Audit Demographics - Checkbox. When checked, the checkout page will display a pop-up to enter audit demographic data.
6. Click Update.
After setting up the Order Payment web module, it may appear, as below, to your customers.
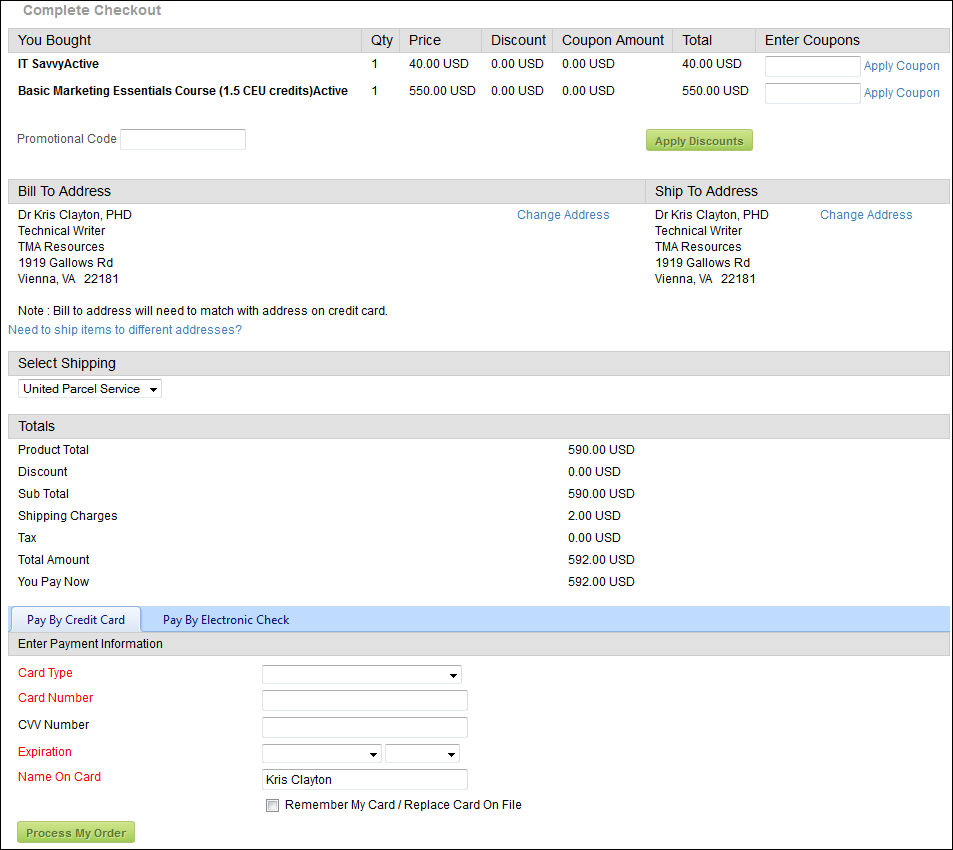
In this example, the Electronic Check Enabled checkbox has been checked
during setup, allowing customers to pay via electronic check. If the customer
clicks the “Pay By Electronic Check” tab, this screen displays:
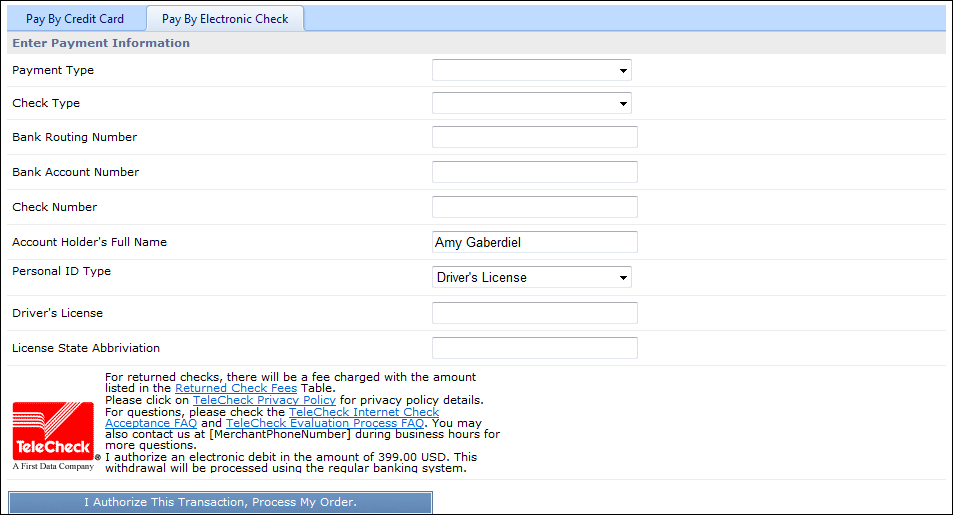
When the customer tabs-in to the Bank Routing Number and Bank Account Number fields, a sample check displays to assist the customer in finding the proper numbers they need to enter, as shown below:

If
an electronic check transaction is declined, it is TeleCheck, not your
company or the system, that is declining the transaction.
eChecks
can only be used for American Dollars. If your organization is using multi-currency,
ensure that you have disabled this functionality for those portals not
using American Dollars as their base currency.
If the option "Collect Subscriber Audit Demographics" was selected, the pop-up below will display for entry of Subscriber Demographic data.