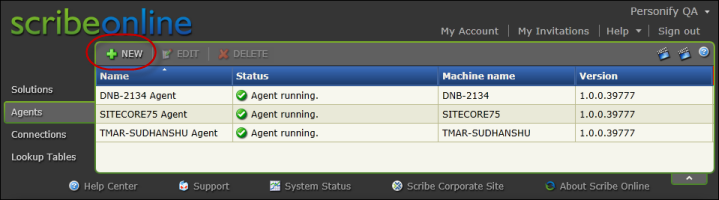
Agents are set up within Scribe to allow you to install the Scribe windows service onto a server within your network. Each agent is uniquely identified by Scribe when it is installed so that Scribe knows where to send requests for data processing. The image below shows you which agents are installed in your network for processing solutions. This screen also allows you to install new agents by clicking the New button, as highlighted below.
When you set up agents, you can choose from a cloud agent, which is used when you have cloud-to-cloud integrations, or an on-premise agent ,which is used when one end of your integration involves an on-premise database or application. Both options are displayed below.
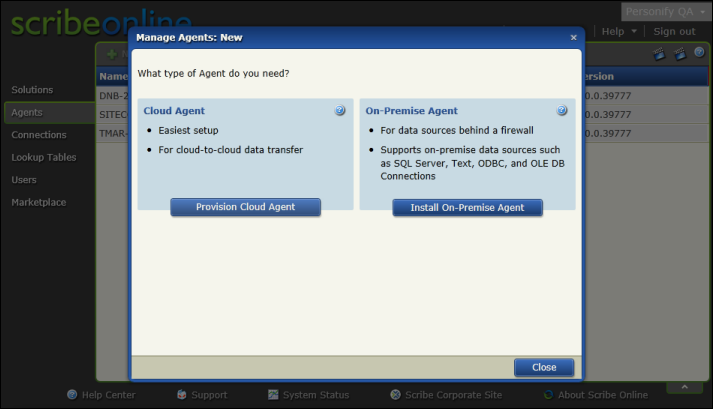
To create a new on-premise agent:
1. Open the Manage Agents dialog box by clicking New from the Agents menu.
2. Click Install On-Premise Agent.
3. Click Copy to copy the Agent key.
The Agent key will be required in a later step.
4. Click Run to begin the installation.
The System Configuration Check window displays.
5. Click Next to continue.
6. From the Welcome to the Scribe Online Agent Setup page, click Next.
7. Paste in the Agent Key that you copied earlier (use Ctrl-V), then click Next.
8. Decide where you want to install the Scribe Online Agent and click Next.
9. Click Install Agent.
10. Click Finish.
After you click Finish, the Agent connects with the Scribe Online cloud, which may take a few minutes. When the connection is successful, the following message displays on the Manage Agents: New dialog box:
<Agent_name> available
Where Agent_name is the name of your Agent, based on the name of the computer on which the Scribe Online On-Premise Agent is installed.
11. Install the Personify Scribe Online Connector file.
12. Click Close.
See Managing Agents in the Scribe Online Help for more information.