 Please
refer to https://ribbs.usps.gov/index.cfm?page=address_manage_quality
for more information on AIS and the ZIP processes.
Please
refer to https://ribbs.usps.gov/index.cfm?page=address_manage_quality
for more information on AIS and the ZIP processes.Five-digit postal codes are maintained in the App_Postal_Code table for zip codes in the United States, U.S. military bases, and U.S. territories. Postal codes are pre-populated in the App_Postal_Code table when Personify360 is delivered. For each postal code, the name of the actual city associated with the postal code as well as the name of nearest main city is provided, along with the state code.
The Zip Code Upload process (ZIP100) is used to load the latest United States Postal Service (USPS) data from their data file with city names and five-digit zip codes into the App_Postal_Code table.
This process uses the Address Information System (AIS) product CITYSTATE, a subscription from USPS available on CD-ROM. The CD-ROM contains a file consisting of a comprehensive list of zip codes with corresponding city names and state codes. Clients who wish to use this interface must purchase an AIS product subscription from USPS. The product is offered on an annual basis, is automatically issued based on the cycle selected (monthly, bimonthly updates), and must be renewed every twelve months.
Please
refer to https://ribbs.usps.gov/index.cfm?page=address_manage_quality
for more information on AIS and the ZIP processes.
Uploaded postal codes may not have a value set for the Country_Code parameter. If this is the case, then set up SQL script to change this value from “null” to “USA.”
To perform the Zip Code Upload process:
1. From the Personify360 main toolbar, select Reporting > Batch Job Submission.
2. Enter
ZIP100 in the Application field and click Search.
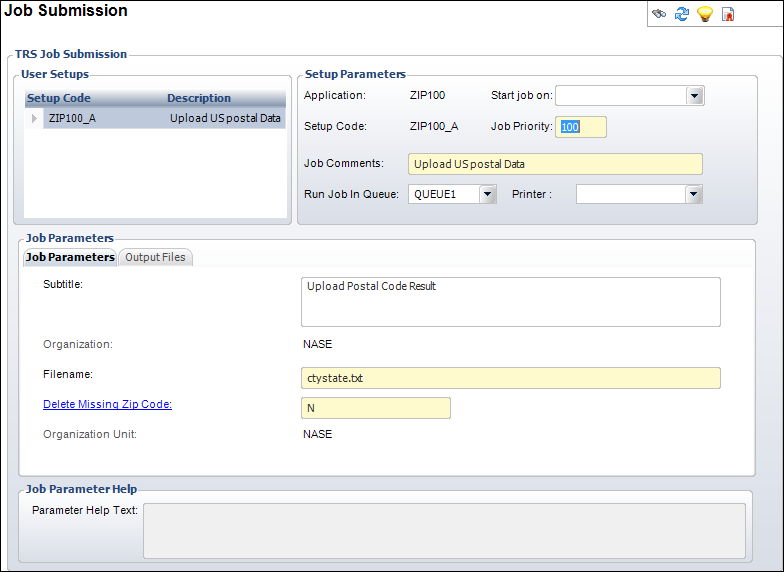
The Job Submission screen displays automatically with the ZIP100 setup
populated, as shown below.
3. Click
Upload input file from the TRS Tasks task
category.
The TRS File Upload screen displays, as shown below.
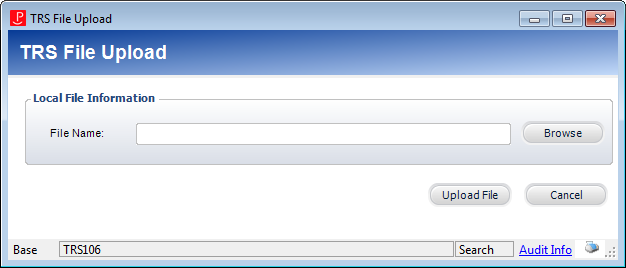
4. Click Browse and search for the ctystate.txt file you saved from the USPS Address Information System Products CITY STATE NATIONAL CD.
5. Click Upload File.
6. On the Job Parameters tab, select the appropriate parameters.
7. Click in a parameter field and refer to the Job Parameter Help at the bottom of the screen for more information on the parameter.
8. Verify the “Validate States” and “Validate Postal Codes” checkboxes are checked on the Country and State Code Maintenance (APP007) screen.
9. Click Run this report now from the TRS Tasks task category.
Screen Element |
Description |
|---|---|
Setup Parameters |
|
Start Job On |
Drop-down. The date and time on which to begin the job. |
Job Priority |
Text box. The job priority applies if more than one job is submitted to the server. The job with the higher priority is picked up first. Defaults to 100. Typically, you do not need to enter this value. |
Job Comments |
Text box. Enter comments concerning the job. Typically, you do not need to enter this value. |
Run Job in Queue |
Drop-down. Select the queue in which the job can be run. Only change the default value if the system administrator specifies a different value. |
Printer |
Drop-down. Select the printer to send the Output Files to. |
Job Parameters |
|
Subtitle |
Text box. The text entered here displays as a subtitle on the report. |
Organization |
Link. The organization that will receive the postal codes. |
Filename |
Text box. The input filename from which the data is loaded. |
Delete Missing Zip Code |
Link. If you enter “Y,” the system deletes the zip codes which are no longer valid in this upload file. |
Organization Unit |
Link. The organization unit that will receive the postal codes. |