 This
step requires you to have DNN host knowledge.
This
step requires you to have DNN host knowledge.This is the second step in installing SSO and IMS.
 This
step requires you to have DNN host knowledge.
To edit the Customer Registration Web Part's Settings:
1. While still logged in as the host/admin, click Register in the Login web part. The Personify - Customer Registration web part displays.
2. Click
the Edit Customer Registration Settings link.
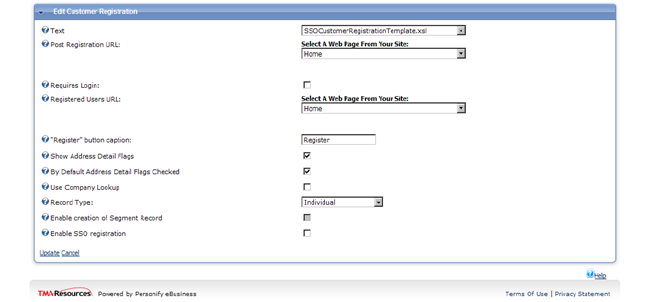
The Edit Customer Registration screen displays, as seen below:

3. Clients have the option of using the INLINE login, where in they can drop the Personify DNN Module - Personify Login on a page or they can use the REDIRECT mode where in the user will be redirected to SSO site when the user clicks on login. This setting can be specified in the web.config as explained later.
4. For both
INLINE Login and REDIRECT Mode, set the template to CustomerRegistration
Template.
The SSOCustomerREgistration template has been deprecated.
5. Click the Enable SSO Registration checkbox.
6. Click Update.