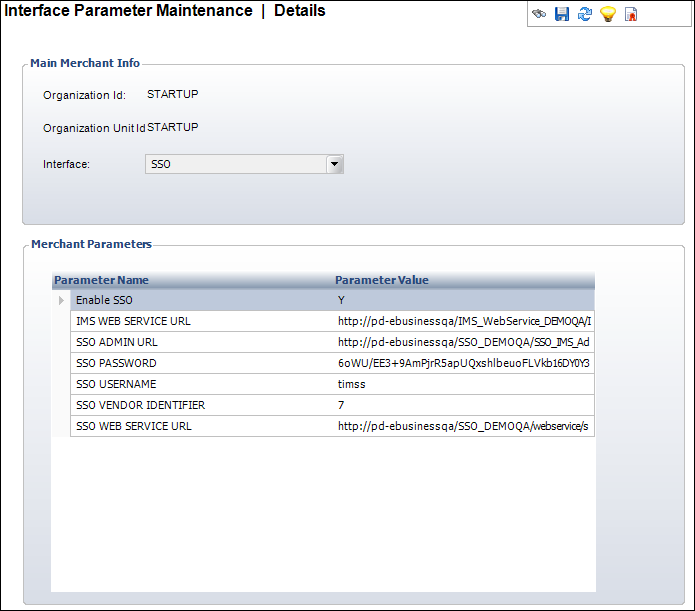
The Interface Parameter Maintenance screen displays, as shown below.

Personify requires the setup of one back office screen for the Single Sign-On application. For more information about a customer's SSO login information, please see
To set up Single Sign-On in the back office:
1. Logged
in as the administrator, select System Admin > Configure
and Verify Interfaces from the menu bar.
The Configure and Verify Interfaces (APP014) screen displays.
2. Click
Setup SSO Interface Parameters.
The Interface Parameter Maintenance screen displays, as shown below.

3. In the Parameter Value column, enter either “Y” (Yes) or “N” (No) for Enable SSO.
4. Enter
the IMS WEB SERVICE URL.
This is used to get the role related data for CRM360 Screen.
5. Enter
the SSO ADMIN URL.
This is the URL for the DNN web site where the SSO admin page is installed.
From the Personify main toolbar if you select System
Admin > System Setup > Basic Constituent IMS Setup, the system
will open a browser with the URL pointing to this setting. For more information
on the Basic Constituent IMS Setup screen, please see IMS
roles in CRM360®
and Donor360®.
6. Enter
your merchant SSO PASSWORD.
Upon entering your password and tab-out, your password will automatically
be encrypted.
7. Enter your merchant SSO USERNAME.
8. Enter
the SSO VENDOR IDENTIFIER.
Personify is defined as a vendor in SSO. The ID comes from the SSO database
from the VENDOR table. You can also access this from the SSO Admin screen
in Personify web.
9. Enter your merchant SSO WEB SERVICE URL.
10. Click Save.