Adding Badge Information to a Meeting Order
Using the Badge Maintenance screen, you can edit or add badge information for a registration. The Badge Count information is read-only and the information is populated based on the counts from setting up the meeting product.
The system maintains the maximum number of badges allowed at the rate code level (Product_Rate_Code). The system restricts the number of badges to be associated with each Order_Detail record.
 You can not update the Nickname field from the Badge Maintenance screen (ORD001P); however, you can update it from the web using the Meeting Registration control. In addition, the Nickname field is the only field where a change will result in the nickname being updated on the customer's record. Any other field that is edited is only stored with the badge and does not update the customer's record. See Defining a Constituent's Name in CRM360 for more information.
To add a badge to a meeting:
1. From the Order Entry search screen, search for an existing order or search for a customer click Create New Order to start a new order.
2. From the Work with Line Items task category, click Maintain Badge Information.
The Badge Maintenance screen displays, as shown below.
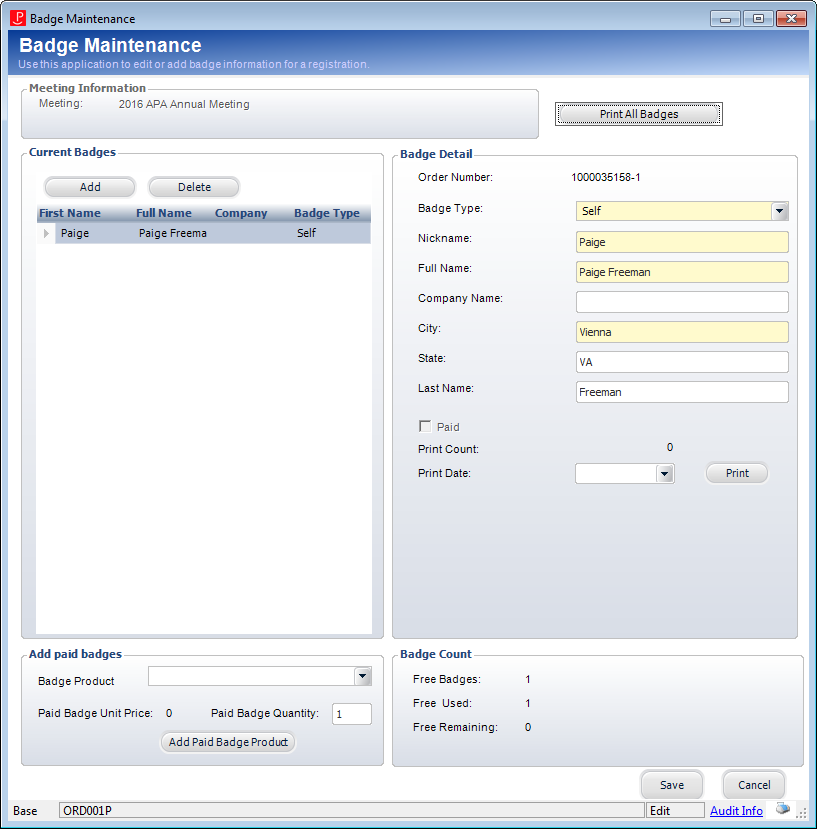
3. The Badge Count section displays how many free badges are available. To add a free badge:
a. From the Current Badges section, click Add.
b. Select the Badge Type from the drop-down.
Values in the drop-down are populated based on the non-fixed codes defined for the MTG "BADGE_TYPE" system type.
c. Enter a Nickname.
d. Enter the Full Name.
e. If necessary, enter the Company Name.
f. Enter the City.
g. If necessary, enter the State.
h. If necessary, enter the Last Name.
i. If necessary, select the Print Date from the drop-down.
This will print the badges on a specific date rather than immediately.
j. Click Print to only print the badge entered in the Badge Detail section or click Print All Badges to print all of the badges.
4. To add a paid badge:
a. From the Add paid badges section, select the Badge Product from the drop-down.
b. Enter the Paid Badge Quantity.
c. Click Add Paid Badge Product.
5. Click Save.