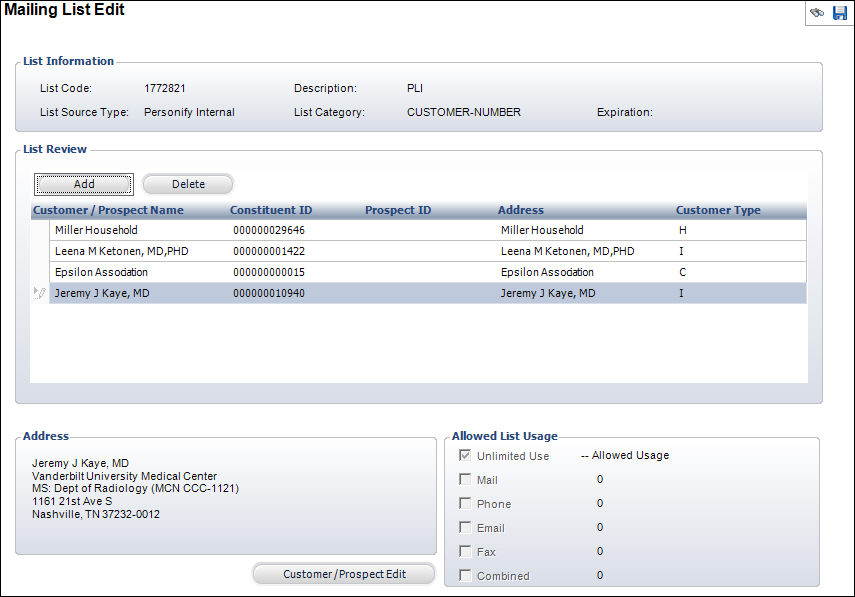
The Mailing List Edit screen displays, as shown below.
Editing a list allows you to edit a marketing list and add “seed” records to the list. Using the Mailing List Edit screen, you can insert or delete records from a specific list as well as edit the results of a new list.
To edit a list:
1. Perform one of the following:
a. From the Marketing and Communication List Maintenance screen, click Edit the List from the List Maintenance task category.
b. From any
marketing screen, click Show List Detail from
the List Management Tasks task category and select the appropriate list.
The Mailing List Edit screen displays, as shown below.
2. Highlight a customer in the table and refer to the bottom of the screen for address and allowed list usage information.
3. To add
a customer to the mailing list, click Add.
The Customer Chooser displays.
4. Search
for the appropriate customer and click Select.
A row is added to the table.
5. If necessary, click in the Prospect ID table cell and select or change the Prospect ID.
6. To delete
a customer from the mailing list, highlight the customer and click Delete.
The customer is deleted from the list.
7. Click Save.
Screen Element |
Description |
|---|---|
Add |
Button. When clicked, the Customer Chooser displays and you can search for a customer to add to the mailing list. |
Delete |
Button. When clicked, the highlighted row is deleted from the table and the customer is deleted from the mailing list. |
Address |
Read-only. Displays the address of the highlighted customer. |
Customer/Prospect Edit |
Button. When clicked, the highlighted customer information displays on the Customer Central screen. From here, you can update the customer’s address. If you change the name or address and the customer was already added to the mailing list, you must delete the customer from the mailing list and add it again to display the changes. |
See Also:
· Creating a New Marketing List