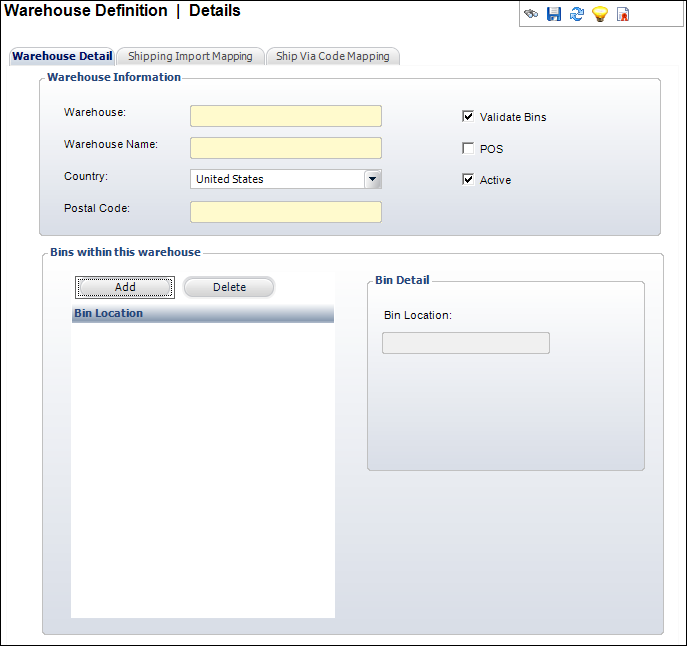
The Warehouse Definition Details screen displays, as shown below.
Creating a new product warehouse includes the creation of warehouse bins, shipping import mapping information, and ship via code mapping information.
Every warehouse must have at least one bin defined. Organizations that do not want to track by bin location can just use a dummy-code for the bin, e.g., “NA”. Warehouses and bins can only be associated with individual INV products, not standing order INV products. Warehouses and bins can be assigned to non-inventoried products, so that packing slips can be generated.
Bins can be made Inactive. The user cannot add inventory to this bin without verifying that it is going to Add a new bin location. When adding a new bin location, the system checks to see if an inactive record for this bin exists prior to creating a new record in INV_Product_Detail. If the bin already exists, but is inactive, the system will make it Active.
To create a new product warehouse:
1. Using the System Administrator persona, from the Personify360 main toolbar, select Products > Product Central.
2. From the Product Related Tasks task category, select Define Warehouses.
3. Alternatively, using the Inventory Product Manager persona, from the Personify360 main toolbar, select Shipping and Inventory > Warehouse Maintenance.
The Warehouse Definition- Search screen displays.
4. Click Create New Product Warehouse.
The Warehouse Definition Details screen displays, as shown below.
5. Enter the Warehouse Code.
This is the unique code for the warehouse. This field is similar to the product code text box.
6. Enter the Warehouse Name.
7. Select the Country where the warehouse is located from the drop-down.
8. Enter the Postal Code where the warehouse is located.
This is used for informational purposes only.
9. Check the checkboxes that apply:
· Validate Bins
This is applicable when you want to track bins. Typically, you do not select this checkbox if there are no restrictions as to where the products are stored within a warehouse or if there are too many bins to maintain administratively.
 If this checkbox is NOT checked, a Bin Location can be manually entered from the Inventory Receipt screen.
· POS
This is the Point of Sale (POS) and identifies any warehouse that will be used for POS transactions. You can use a POS warehouse for on-site sales at meetings. An on-site warehouse at a convention, for instance, assumes that the product is delivered directly to the customer and no shipping is charged. The system never selects a Point of Sale (POS) warehouse automatically in an order line. In that regard, the system treats POS warehouses as if they were storage warehouses. Even if a product being ordered is backordered and there is available inventory in a POS warehouse, the system will put the order line on backorder. It will NOT automatically select a POS warehouse. When a POS order is created or when a POS batch is open, the system will automatically set the line status = A (active) and the fulfill status = P (preshipped).
 POS warehouses cannot be used on the web because POS warehouses required a POS batch.
· Active (selected by default)
This indicates if this warehouse can be used in a product to receive inventory. If this checkbox is NOT selected, contains inventory, and has been assigned to an order, the order will still be fulfilled from this warehouse.
If you uncheck this checkbox, and the warehouse is attached to an inventoried product, the system will uncheck the Active checkbox on the Inventory Locations for this warehouse. The system will display a warning message before you can proceed.
If a warehouse is active and has been used in a product, unchecking this checkbox to make the warehouse not Active will display the following warning message, as shown below:
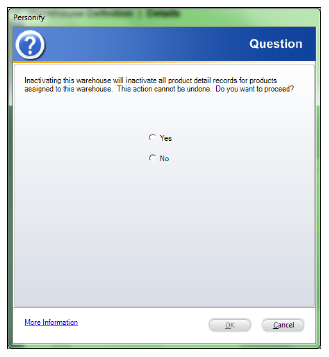
If you select Yes, this warehouse and ALL the product warehouse detail records will be inactivated.
If you select No, then this warehouse will be inactivated and all the product warehouse detail records will not be affected.
10. From the Bins within this warehouse section, click Add.
A new record is added to the grid below and the Bin Detail section becomes enabled.
11. Enter the Bin Location name, as highlighted below.

12. Click Save.
Proceed to define Shipping Import Mapping and Ship via Code Mapping.