Uploading DCD Files
The Digital Content Maintenance task is where you actually upload the
product you are selling. This screen allows you to upload the DCD product,
create a description of the product, create copyright information, etc.
 Since
Personify360 allows you to add more than one file per DCD product, on
your e-Business website the “Add to Cart” button will not be available
from the Product Listing. Your customers must view the DCD product’s Product
Detail screen and select which files they want to download before adding
the product to their shopping cart.
Since
Personify360 allows you to add more than one file per DCD product, on
your e-Business website the “Add to Cart” button will not be available
from the Product Listing. Your customers must view the DCD product’s Product
Detail screen and select which files they want to download before adding
the product to their shopping cart.
To upload digital content:
1. From the
Personify360 main toolbar, select Products > Product
Central.
The Product Maintenance search screen displays.
2. Click Search
to find a product or click Create
New Product.
3. From the
Product Definition task category or Subsystem Specific, click Digital
Content Maintenance.
The Digital Content Maintenance screen displays, as shown below.

4. From the
Files Available Through this Product Code section, click Add
Content.
A new line is added to the grid and the Digital Content Details section
becomes active.
You can add multiple lines to the grid if
you want to offer multiple DCD files as a package. You create one DCD
product and add DCD files as components of this product. For example,
if you want to offer multiple e-Learning Audio seminars as one DCD product,
you can add all the audio files here. The web user would be charged for
the one DCD product and would receive multiple files; however, if you
want to charge your web user for each DCD file, you would set them up
as separate products.
If the component
DCD products have the same license agreement, you should only check the
Display Copyright checkbox for the first DCD
file. However, if you have different license agreements for a few of the
component DCD files, make sure they are listed at the beginning of the
Files Available Through this Product Code section, because if not, on
the web if it the DCD file is listed farther down the list with a license
agreement, it will display as a View More link to your web user.
5. Select
the Source from the drop-down.
There are
two sources currently available: File and URL. If you select URL
as the source, the Type should
be set to 'OTHER' and the URL text should be entered in the File
Name field.
6. Select
the Type from the drop-down.
7. Click
the Upload File link.
The Open window displays. Search for and open the digital file you want
to add as part of the product. You can upload a file of any type. It is
recommended that you create separate, specific codes for each type to
ensure files are labeled accurately. The size of the file will be restricted
by the MAXFILEUPLOADSIZE application
parameter.
8. Enter
the Title in the text box.
9. Click
Edit Text to the right of the Description
text box.
The HTML Editor Dialog window opens. Enter a description of this digital
file and click OK.
10. Select
the Available From date for this file.
11. If necessary,
enter the Available To date for this file.
12. If you
want copyright information to display along with the DCD file, you can
set the copyright information from the Digital Rights Management Copyright
Acknowledgement section.
As a best practice, if you have component DCD fields that have the same
license agreement, only enable the copyright information for the first
component DCD file, as shown below.
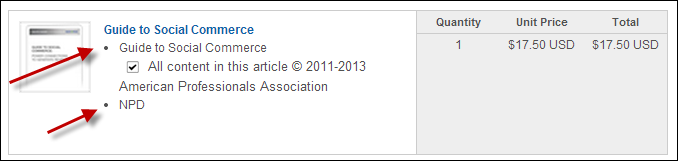
However, if you have different license agreements for a few of the component
DCD files, make sure they are listed at the beginning of the Files Available
Through this Product Code section, because if not, on the web if the DCD
file is listed farther down the list with a license agreement, it will
display as a View More link to your web user, as shown below. See Checkout
Control for more information.

If a piece
of digital content is set up for pre-order (i.e., the Available From date
of the digital content is in the future), the copyright text will not
display during the checkout process. The proper setup would be to set
the copyright to display upon access.
13. Click
Edit Text to the right of the Copyright
Text text box.
The HTML Editor Dialog window opens. Enter your copyright information and
click OK.
14. From Display Prior To, check either the
Purchase or Access checkbox.
If you do not wish to enable the Copyright
Text, you do not need to select either checkbox.
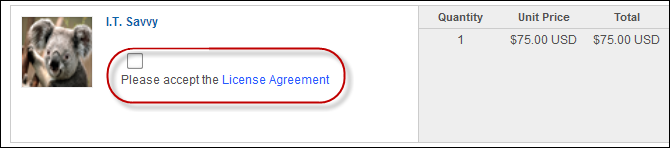
a. When the
Purchase checkbox is checked,
this text displays on the Checkout control on the web, as shown below.
See Checkout
Control for more information.
If a piece
of digital content is set up for pre-order (i.e., the Available From date
of the digital content is in the future), the copyright text will not
display during the checkout process. The proper setup would be to set
the copyright to display upon access.
b. When the
Access checkbox is checked, any
copyright information you add to the product will display when the user
views the content from the Digital Content Access control on the web,
as shown below.
15. From the
Access Settings section, select either the Download
or View checkbox.
a. If the
Download checkbox is checked, the Limit Access checkbox becomes editable.
b. If the
View checkbox is checked, the Allow Print During View, Display Watermark
During View, Watermark Text, and Limit Access checkboxes become editable.
16. If you
want to limit the amount of times a customer can download this file, check
the Limit Access
checkbox and perform the following:
a. Enter
the Max Number of Downloads.
b. In the
From Invoice Date, Access Allowed for text box,
enter a number for the time you want the product to be available for download
and/or view after being invoiced and select "Day" or "Month"
from the drop-down.
17. Click
Save.
18. View the
file that you have uploaded by clicking the Preview
link.
Screen Element |
Description |
Files Available Through
this Product Code |
Add Content |
Button. When clicked, a new row is added
to the grid and the Digital Content Details fields become active. |
Delete Content |
Button. When clicked, the highlighted
row is removed from the grid and any information in the Digital
Content Details fields is lost. |
Digital Content Details |
Source |
Drop-down. A required drop-down that allows
you to select whether the digital content is a file to be uploaded
to Personify360 or is a URL to be referenced by Personify360.
This field defaults to File.
As of 7.6.1, you now have the ability to define
a URL as the source of your digital content. This allows you to
be able to define digital content that is not managed via Personify360
for a DCD product, meaning you can define digital content that
is hosted and managed by a content distribution network (CDN)
or digital content that is hosted and managed on a web server.
When you select URL as your source, the Upload
File link will be disabled. You can define the File Name as a
URL up to 250 characters. For a source of URL, the Type should be set to 'OTHER'
and the URL text should be entered in the File
Name field.
Defining digital content with
a source of URL indicates that the management of the content is
no longer handled or restrained by Personify360. Personify360
is only acting as a conduit for the content by providing a means
to charge for and subsequently distribute the content.
 When using a source of File and
uploading the file into Personify360, the file is stored in a
folder named as the PRODUCT_ID in the path specified for the DCDFiles
upload root in the T_##_AppInstance.ServerConfig column of the
Personify Installation Database When using a source of File and
uploading the file into Personify360, the file is stored in a
folder named as the PRODUCT_ID in the path specified for the DCDFiles
upload root in the T_##_AppInstance.ServerConfig column of the
Personify Installation Database
|
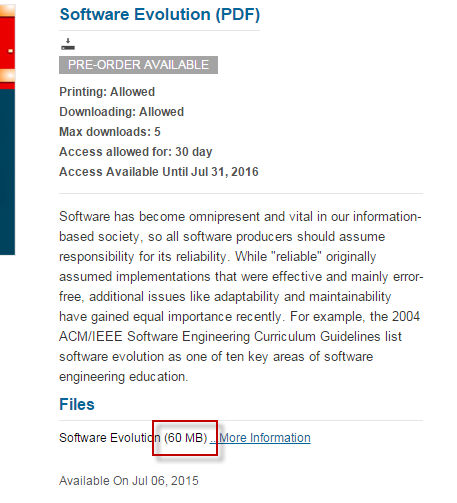
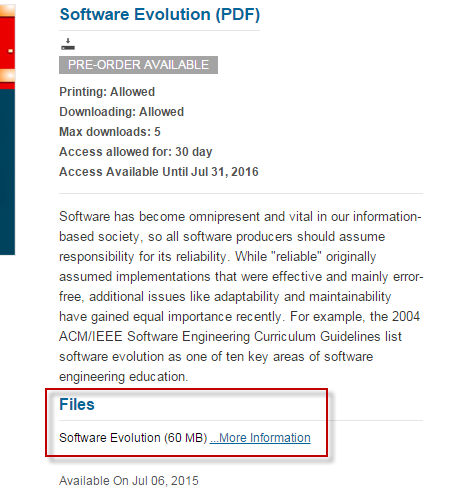
Size |
Text box. A non-required text field that
allows you to define the size of the digital content regardless
of the unit of measurement. If a value is entered within this
field, it will display under the "Files" section on
the ECD/DCD product detail page, as shown below.
|
Type |
Drop-down. A required drop-down that allows
you to define the file type via the CONTENT_TYPE
type code of the digital content. |
File Name |
Text box. The name of the file being uploaded.
If URL is selected for your source, you can define the File Name
as a URL up to 250 characters. |
Upload File |
Link. When clicked, the Open window displays
and you can find the file on your system that you want to upload.
This link will only be enabled if the Source is defined as File. |
Title |
Text box. Allows you to create a friendly
name for the file being uploaded. As of 7.5.0, if
this product has been defined to display on the web, this
document title will display in the "Files" section on
the ECD/DCD product detail page, as shown below.
|
Preview |
Link. Allows you to preview the content
you are creating when the Source is defined as File. You can only
preview the product after uploading the file and creating a Document
Title. |
Description |
Text box. Displays the description you
created for the file. As of 7.5.0, if this product has been defined
to display on the web, this description will display in the "Files"
section on the ECD/DCD product detail page when the user clicks
the "More Information" link, as shown below.
|
Available From |
Calendar Drop-down. The date from which
this file is available to purchase. This field defaults to the
system date. |
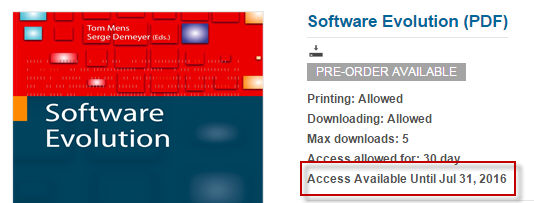
Available To |
Calendar Drop-down. The date this file
is no longer available for purchase. If a value is selected for
this field, it will display for the product within the Product
Detail control.
|
Digital Rights Management |
Copyright Acknowledgement |
Edit Text |
Button. When clicked the HTML Editor Dialog
window displays and allows you to enter either the product’s description
or copyright information. |
Copyright Text |
Text box. A non-required text field that
allows you to add copyright information for the digital content. |
Display Prior To |
Allows you to select when the copyright
information is displayed and must be acknowledged. The two options
are prior to Purchase from the Checkout control on the web or
prior to Access from the Digital Content Access web control. |
Purchase |
Checkbox. When checked, any copyright
information you add to the product will display on the Checkout
control on the Web, as shown below. See Checkout
Control for more information.
If a piece of digital content
is set up for pre-order (i.e., the Available From date of the
digital content is in the future), the copyright text will not
display during the checkout process. The proper setup would be
to set the copyright to display upon access. |
Access |
Checkbox. When checked, any copyright
information you add to the product will display when the user
views the content from the Digital Content Access control on the
web, as shown below.
|
Access Settings |
Access Method |
Allows you to select the method of access
from the Digital Content Access web control for the digital content.
The two options are Download and View. Both options can be selected
for one digital content file.
 If neither option is selected,
the content will not be accessible from the web. If neither option is selected,
the content will not be accessible from the web.
|
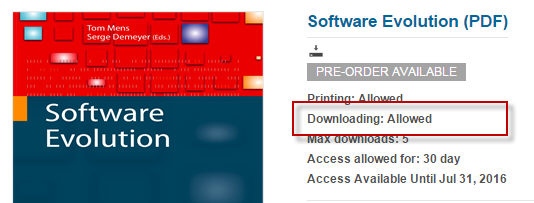
Download |
Checkbox. If checked, you will be able
to download the digital content from the Digital Content Access
control on the web, and the Product Detail control will show that
downloading is allowed, as shown below. This field defaults to
checked.
|
View |
Checkbox. If checked, you will be able
to view the digital content from the Digital Content Access control
on the web if it is in the format of ePUB,
PDF,
MP3,
or MP4.
Clicking the title link within the Digital Content Access control
will open the content within the correct viewer for the file type. |
Allow Print During View |
Checkbox. Allows you to enable or disable
printing of digital content with a file format of PDF
from the respective content viewer web control. This checkbox
is only editable if the View checkbox is checked for the Access
Method.
Printing is only available for
digital content with a file format of PDF. |
Display Watermark During View |
Checkbox. Allows you to enable or disable
a watermark that is presented over digital content from the Content
Viewer web control. By default, the watermark contains the constituent's
Label Name and Customer ID. The default watermark can be modified
through the CSS skin. This would require a customization by the
client. This checkbox is only editable if the View checkbox is
checked for the Access Method.
For the Video
Viewer control, the watermark will not display on iOS devices,
such as the iPhone and iPad, as the operating system video player
takes the control of the content away from the browser.
The watermark is at the control
level, meaning it will not display on downloaded content. |
Watermark Text |
Text box. A non-required text field that
allows you to define additional watermark text to display along
with the constituent's Label Name and Customer ID. This field
is only enabled when the View checkbox is checked for Access Method.
This setting is not applicable for audio digital content. |
Limit Access |
Checkbox. When checked, a customer can
only download the DCD product a specified amount of times and/or
within a specified time limit. Access to digital content can be
restricted in two ways. The first is to restrict the maximum number
of downloads for the digital content. The second is to restrict
the window from the invoice date in which the constituent can
download and view the digital content. |
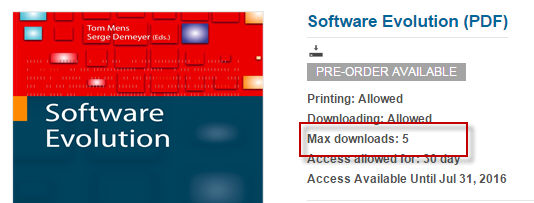
Max
Number of Downloads |
Text box. Allows you to set the number
of times the DCD product can be downloaded by a customer. As of
7.5.0, if this product has been defined to display on the web,
this number will display on the ECD/DCD product detail page, as
shown below. If this value is null, "Unlimited Downloads"
will display.
This field will only be editable
if the Download checkbox is checked for Access Method and the
Limit Access checkbox is checked.
The "Max Downloads"
number is only displayed at the ECD/DCD product level, not at
each individual file level. It is assumed that an organization
has the same setup for all files included in an ECD product. |
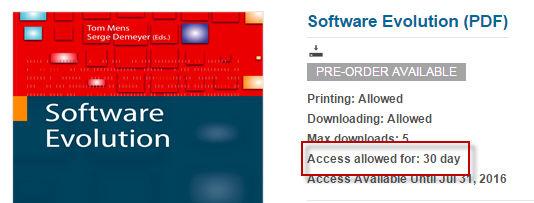
From
Invoice Date, Access Allowed for |
Text box. Displays the number of days
or months after the invoice date that thedigital content can be
accessed.
This field will only be editable
if the Limit Access checkbox is checked. |
Drop-down. Allows you to choose whether
the amount entered in the “From Invoice Date, Download Allowed
For” text box is for Days or Months. Values in the drop-down are
populated based on the fixed codes defined for the DCD "TIME_TO_DOWNLOAD_UNIT"
system type.
This field will only be editable
if the Limit Access checkbox is checked.
Once a value has been selected for the field,
the Access allowed for will populate for the product on the Product
Detail page.
|