 For
more information about the Personify360 Salesforce.com integration, please
see Salesforce.com
(SFDC) Integration.
For
more information about the Personify360 Salesforce.com integration, please
see Salesforce.com
(SFDC) Integration.As of 7.6.1, based on your organization's definition of rules to keep data synchronized between Personify360 and Salesforce, this batch process updates data in Salesforce based on changes in Personify360 customer-related data and updates customer-related data in Personify360 based on changes in Salesforce customer-related data.
 For
more information about the Personify360 Salesforce.com integration, please
see Salesforce.com
(SFDC) Integration.
This batch process should FIRST be run in MIGRATE_TEST mode to generate a report of the data that will be migrated when run in MIGRATE_DATA mode. This process should then need to be run only ONCE in MIGRATE_DATA mode to initially migrate the data between Personify360 and Salesforce and once in MIGRATE_UPDATE_RELATIONSHIP mode to initially update the relationships in Personify360 and Salesforce for the first time. For all subsequent runs, when data needs to be synced, you must run the process in SYNC mode.
 It
is recommended that you then schedule this process to be run on an hourly
basis in SYNC mode to ensure that the data between Personify360 and Salesforce
is kept in sync.
For better performance when working with a large number of records, you should migrate the Account/Company records first. To do so, you should run the CUS560 process in MIGRATE_DATA mode for all Accounts only by putting the filter value of ‘1=2’ in the Salesforce contact model mapping. This will ensure that no contact/individual customer records are picked up by the process. The process should then be run in MIGRATE_UPDATE_RELATIONSHIP mode with the same filter. Once those two jobs are completed, you should migrate the individual Employees/SFDC contact records. To do so, you should run the CUS560 process in MIGRATE_DATA mode for all Contacts only by putting the filter value of ‘1=2’ in Salesforce company model mapping. This will ensure that no company/account records are picked up by the process. Again, you should then run the process in MIGRATE_UPDATE_RELATIONSHIP mode with the same filter to update contact relationship records.
When this process is run in SYNC mode, the stored procedure will perform the following actions based on the value returned:
MATCH
If a match was found based on the "Personify360 Matching Field"
and "Salesforce Matching Field" values defined in the mapping,
the system will check for the "Source of Truth" defined
in the mapping. If the "Source of Truth" is Personify360,
the system will copy all data for the mapping fields and update records
in SFDC. If the "Source of Truth" is SFDC, the system will
copy all data for the mapping fields and update records in Personify360.
MODIFIED_IN_BOTH
If a record(s) was modified in both Personify360 and SFDC, the system
will check for the "Source of Truth" defined in the mapping.
If the "Source of Truth" is Personify360, the system will
update the record(s) in SFDC. If the "Source of Truth" is
SFDC, the system will update the record(s) in Personify360.
NEW_IN_PERSONIFY
or MODIFIED_IN_PERSONIFY
If any new records were found in Personify360 or if any records were
modified in Personify360, the system will create or update the records
in SFDC.
NEW_IN_SALESFORCE
or MODIFIED_IN_SALESFORCE
If any new records were found in SFDC or if any records were modified
in SFDC, the system will create or update the records in Personify360.
These actions display in the "Actions Performed" column in the CUS560_PROCESSED report (see below).
 Before
running this process, be sure to click the Refresh
Sync button on the Personify360
Salesforce Schema Modifier screen for all related models.
Parameter |
Description |
Required? |
|---|---|---|
Run Mode |
The mode in which the process runs: · MIGRATE_TEST - this mode runs a report of the data that will be updated in the database when run in MIGRATE mode. · MIGRATE_DATA - when first setting up your integration, this mode syncs data between Personify360 and SFDC for the first time. This mode should only be used once during initial setup. · MIGRATE_UPDATE_RELATIONSHIP - as of 7.6.1FP1, when first setting up your integration, this mode syncs relationships between Personify360 and SFDC for the first time. This mode should only be used once during initial setup.
· SYNC - this mode syncs data between Personify360 and SFDC. CUS560 should be scheduled to run on an HOURLY basis. |
Yes |
Organization |
The Organization ID for which the process will run. Defaults to the org of the logged in user and cannot be changed. |
Read-only |
Organization Unit |
The Organization Unit ID for which the process will run. Defaults to the org unit of the logged in user and cannot be changed. |
Read-only |
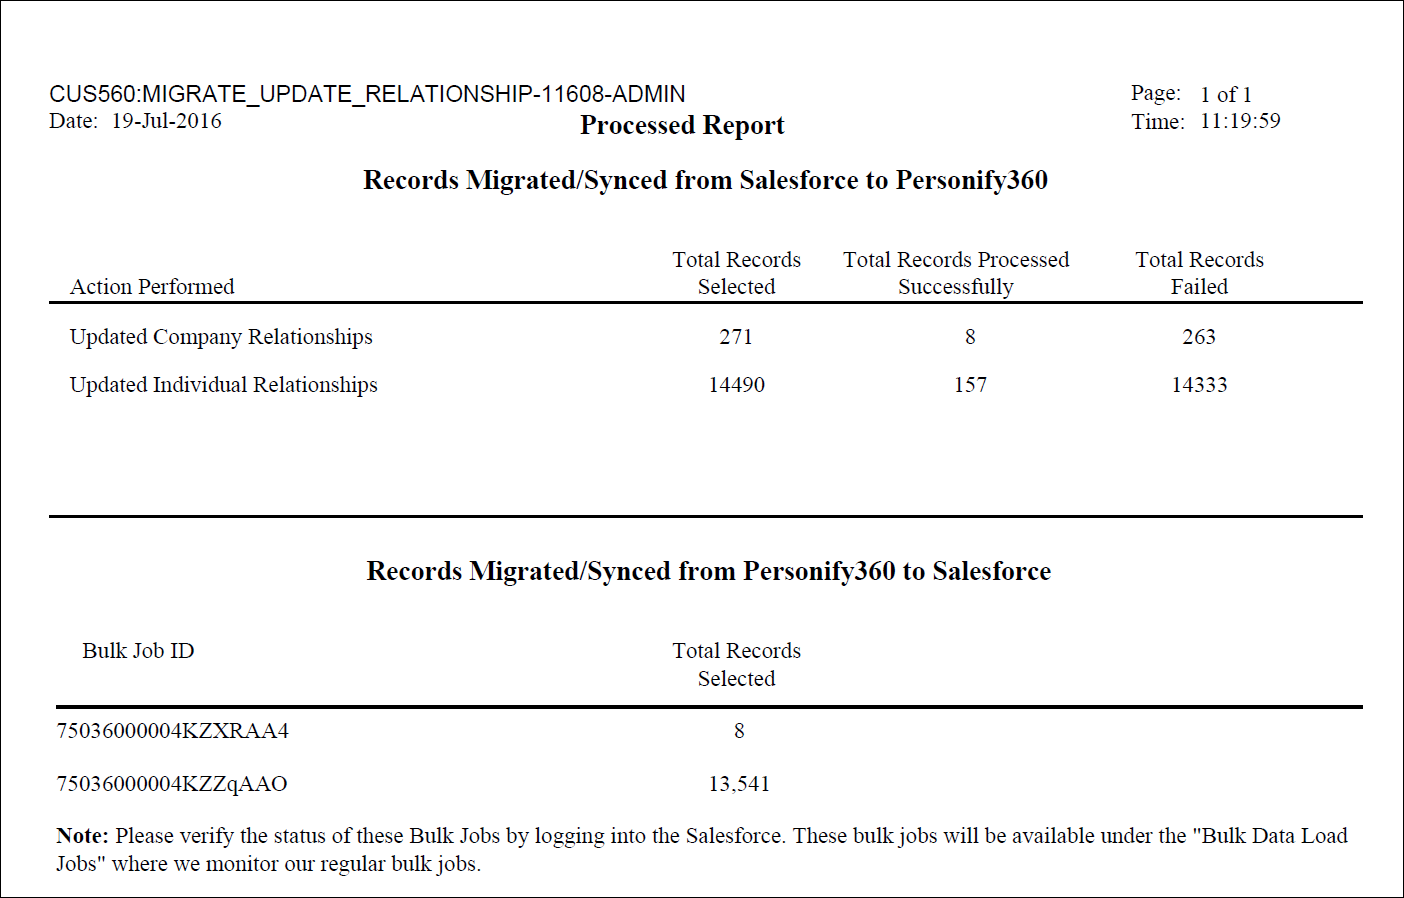
When CUS560 is run in MIGRATE_TEST or MIGRATE_DATA mode, this report displays the total number of records selected, processed, and failed during the migration of data between SFDC and Personify360. When CUS560 is run in SYNC mode, this report displays the total number of records selected, processed, and failed during the synchronization of data between SFDC and Personify360.

This report displays a list of potential duplicate customers identified during the migrate or synchronization of data between SFDC and Personify360. Please note that the system will only attempt to identify duplicates if the Matching Enabled checkbox is checked in the data model mapping setup. If this checkbox is checked, the system will look to the Personify360 Matching Field and Salesforce Matching Field fields defined on the data model mapping to check for potential matches.

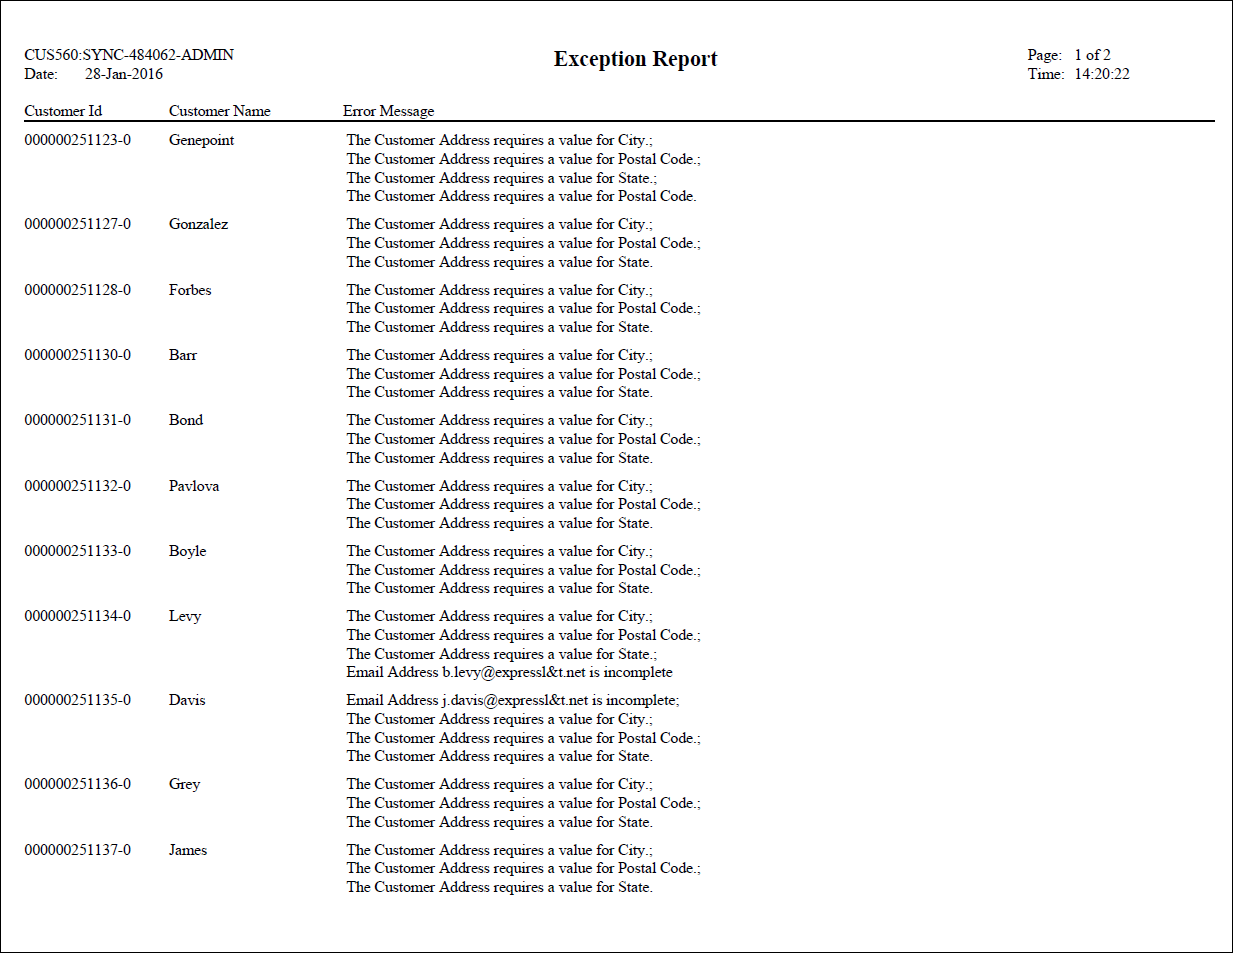
This report displays any customer records that were not migrated or synced when CUS560 was run.

If you run the CUS560 process and the following error displays in the exception report, please follow the steps below to troubleshoot the issue.

To troubleshoot failed SFDC jobs:
1. Copy the job ID from the exception report.
2. Log into SFDC using administrator credentials.
3. From the top, right corner, click Setup.
4. From the left menu,
under Monitor, select Jobs
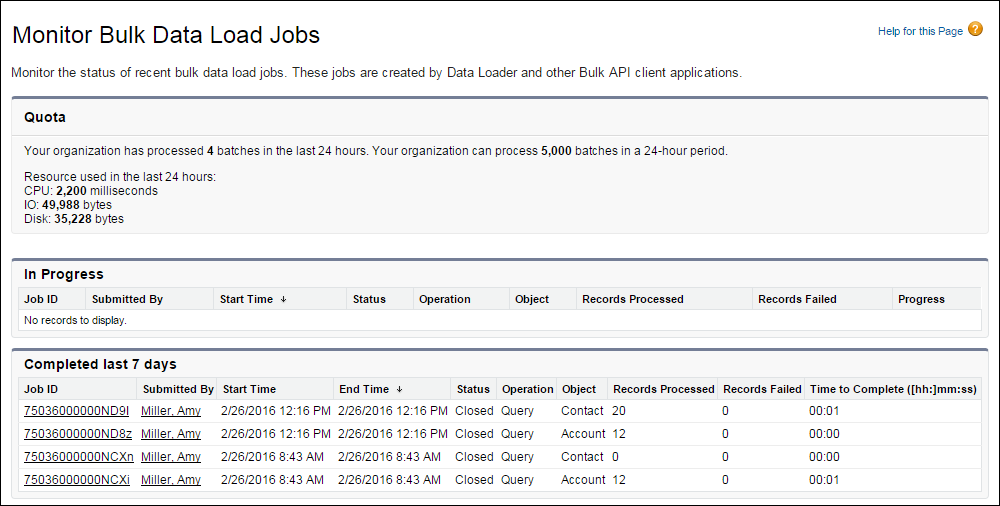
> Bulk Data Load Jobs.
The Monitor Bulk Data Load Jobs page displays, as shown below.

5. Click the appropriate
job ID from the exception report.
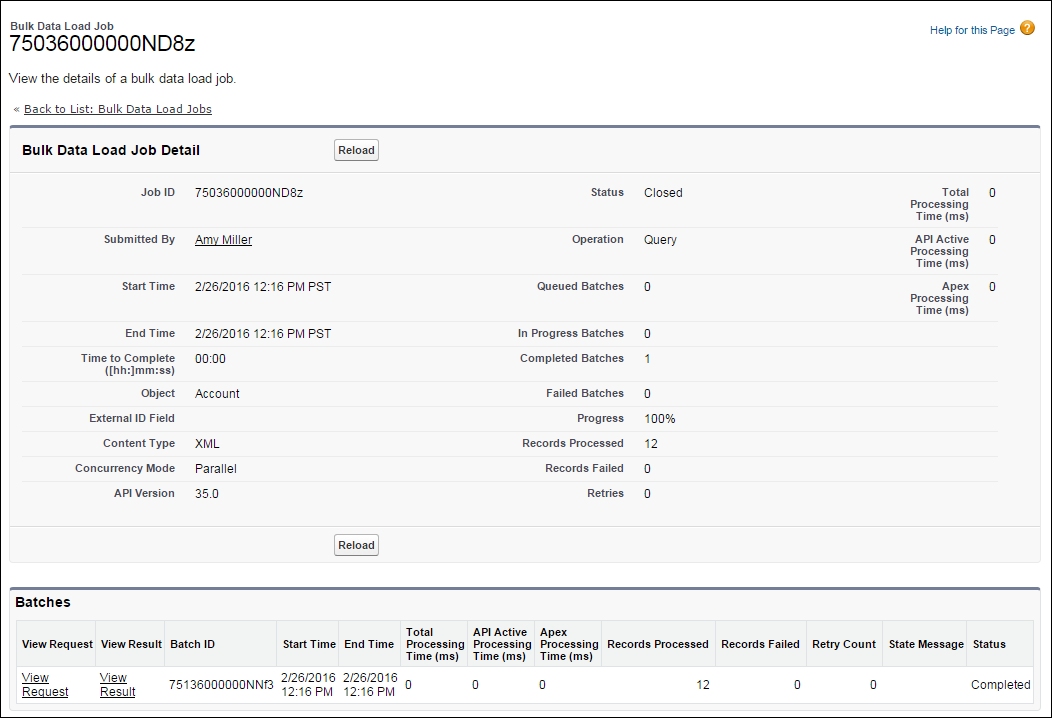
The Bulk Data Load Job Detail page displays, as shown below.

6. From the Batches
section at the bottom, ensure that the corresponding batches of the job
ID have a Status of "Completed".
Then, point to the text in the State
Message column.
The full error message displays, as shown below.

7. Review the error message for possible clues as to why the SFDC job failed.