Adding Members to a Subgroup
After you have created a subgroup, you will need to populate the subgroup with members. In Personify360, your subgroups are populated based on customers who have purchased certain membership products. This is done by linking your newly created subgroup to a membership product. Any customer who then purchases that product will automatically be added to the linked subgroup. A subgroup can be linked to either a single membership product or multiple membership products.
To add a member to a subgroup:
1. After creating a new subgroup (as detailed in the previous section), click Products > Product Central.
The Product Maintenance search screen displays.
2. Perform a search for the membership product you want to link your subgroup to, ensuring that you have selected the Membership Subsystem as the Product Area search parameter.
 If you are planning to create a new membership product to link the subgroup to, see Creating a Membership Product. This will give you all the necessary instructions for setting up a new membership product. After completing this you can continue on to Step 2.
3. Double-click the desired membership product.
The Product Maintenance General Setup screen displays, as shown below.
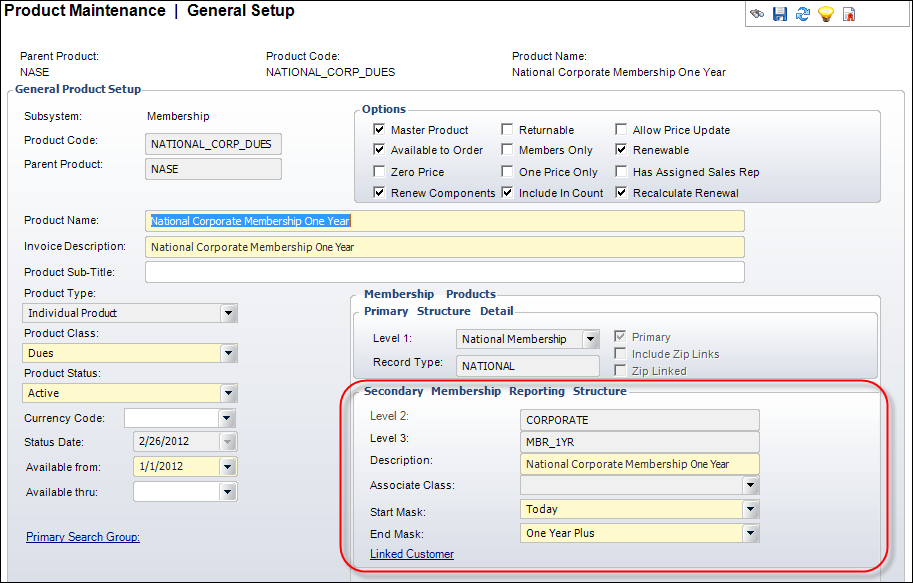
4. In the Secondary Membership Reporting Structure section (highlighted above), change the Description, if necessary.
5. Select the Start Mask and End Mask from the drop-downs.
6. Click the Linked Customer link.
The Customer Chooser displays.
7. Perform a search for and select the subgroup you want to link to this membership product.
8. Click Save.
Any members who have purchased this membership product will now be linked to the selected subgroup. These steps can be repeated if you want to link the subgroup to multiple membership products.